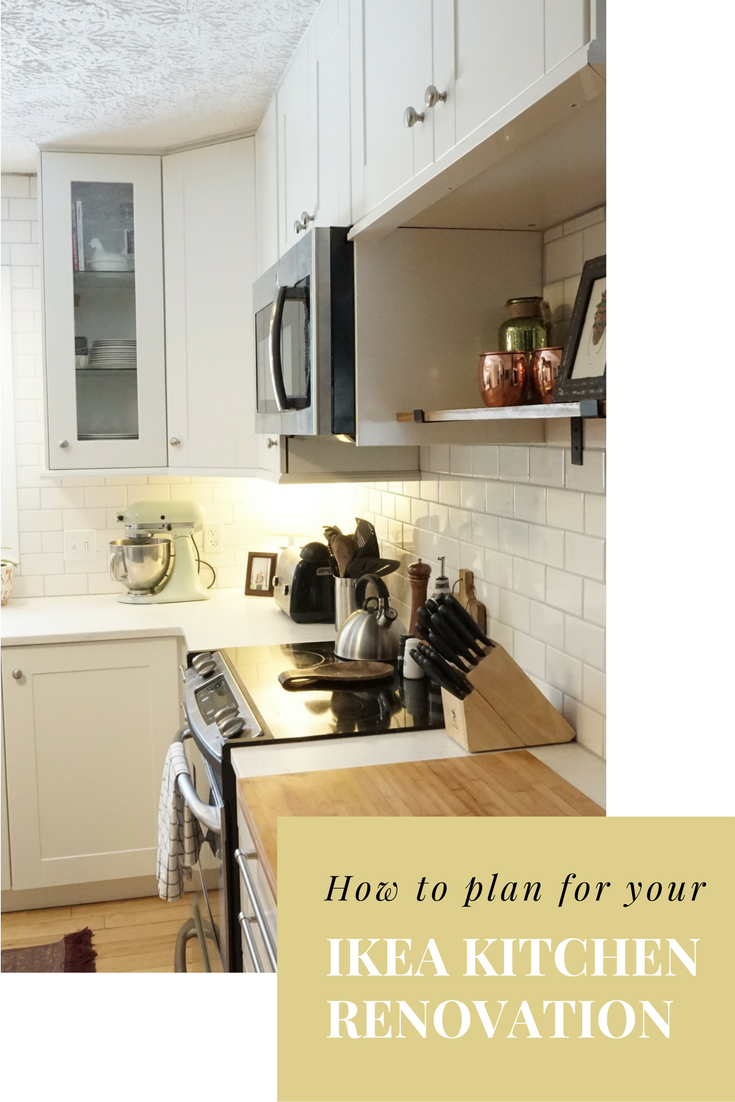
The thought of beginning a kitchen remodel can be incredibly overwhelming. There’s always going to be a handful of factors that keep you from pulling the trigger. Once you get a budget set and your money saved, you can just take it one step at a time. The biggest tip I can give you is to have a clear idea of what you want your kitchen to look like in the end. If you do the work and research up front, many issues will be easily solved throughout the process, and you will be more satisfied in the end.
1. Create a Mood Board
Whether you have a Pinterest board dedicated to your kitchen ideas, a folder with magazine clippings, or an actual board with pictures tacked on to it, having a visual for your dream kitchen is a must. I created my Pinterest Kitchen Renovation Ideas board a couple years ago when I knew the renovation was hopefully sooner than later. Whenever I would scroll through Pinterest, which is nearly daily, I would pin images that stood out to me.
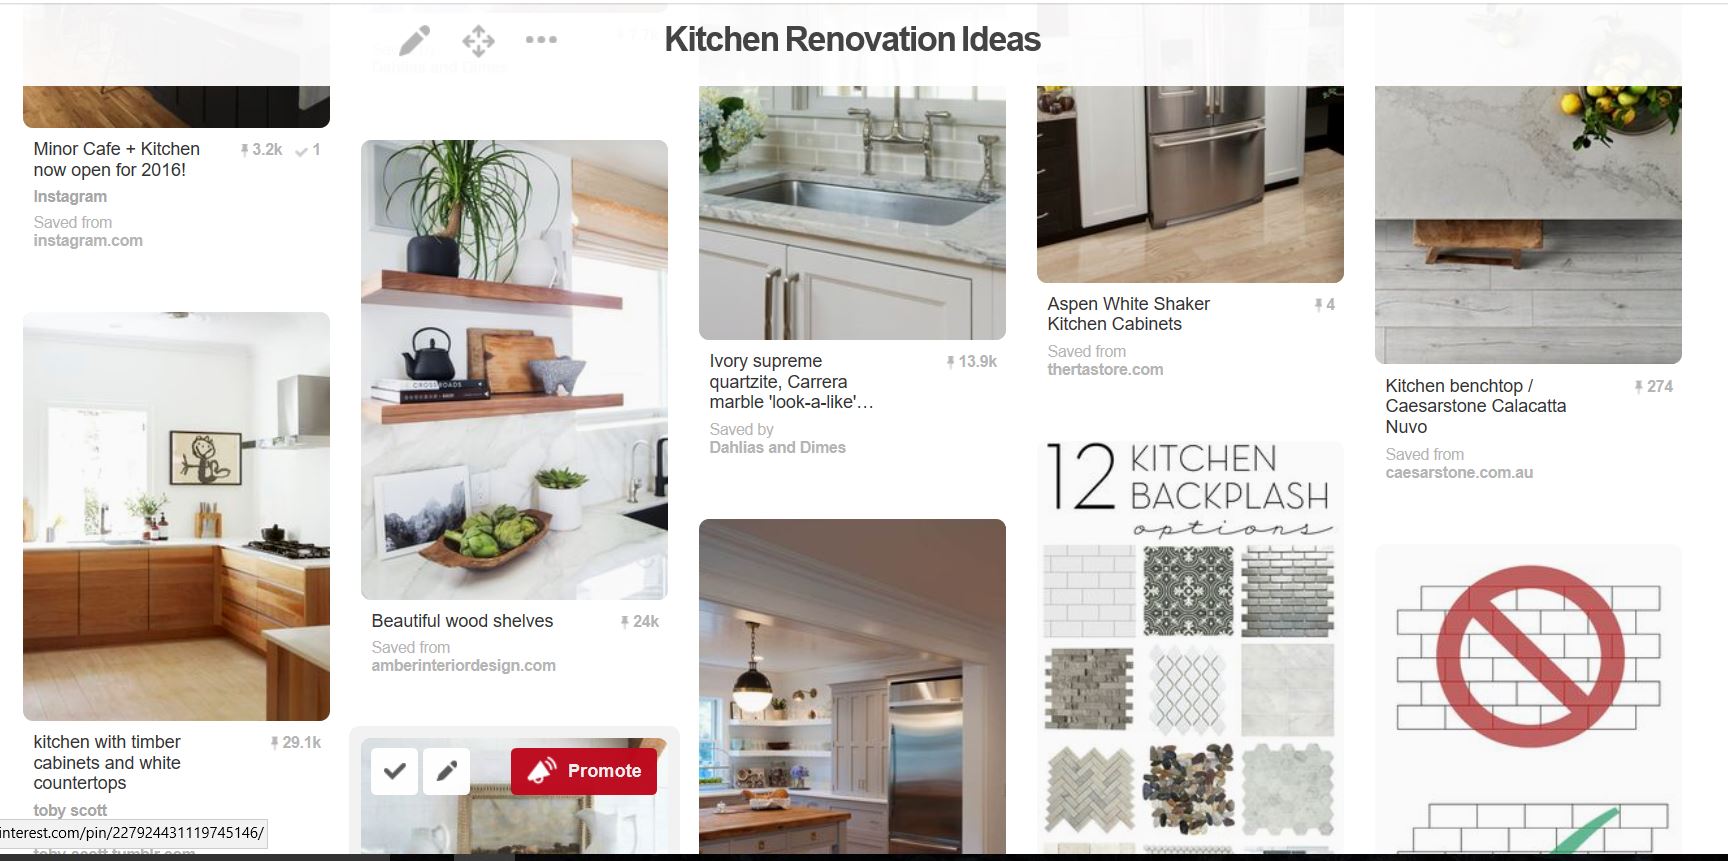
Get specific. If you like the faucet or hardware in a picture, pin it and type what you actually like in the description. This will keep your thoughts organized, so that you’re not looking back through your board wondering what you liked about the picture. I even pinned tutorials, molding ideas, and rugs. Not every picture has to contain an actual kitchen. Think about every aspect of your kitchen when pinning. In the end, you will want to look at your mood board and see a consistent style. This will help you when choosing colors, cabinets, and all the details.
2. Measure Your Kitchen
This was my least favorite part, yet the most important. For starters, you’ll need a spouse/friend, measuring tape, graph paper, and a pencil. (1) First, measure the length of the walls starting from the corners. (2) Add in all of the door opening and windows. Make your measurements are precise. (3) Then you will tack in your appliances, electrical outlet, and plumbing. (4) Lastly, record your wall height.
Our final drawing looked like this.
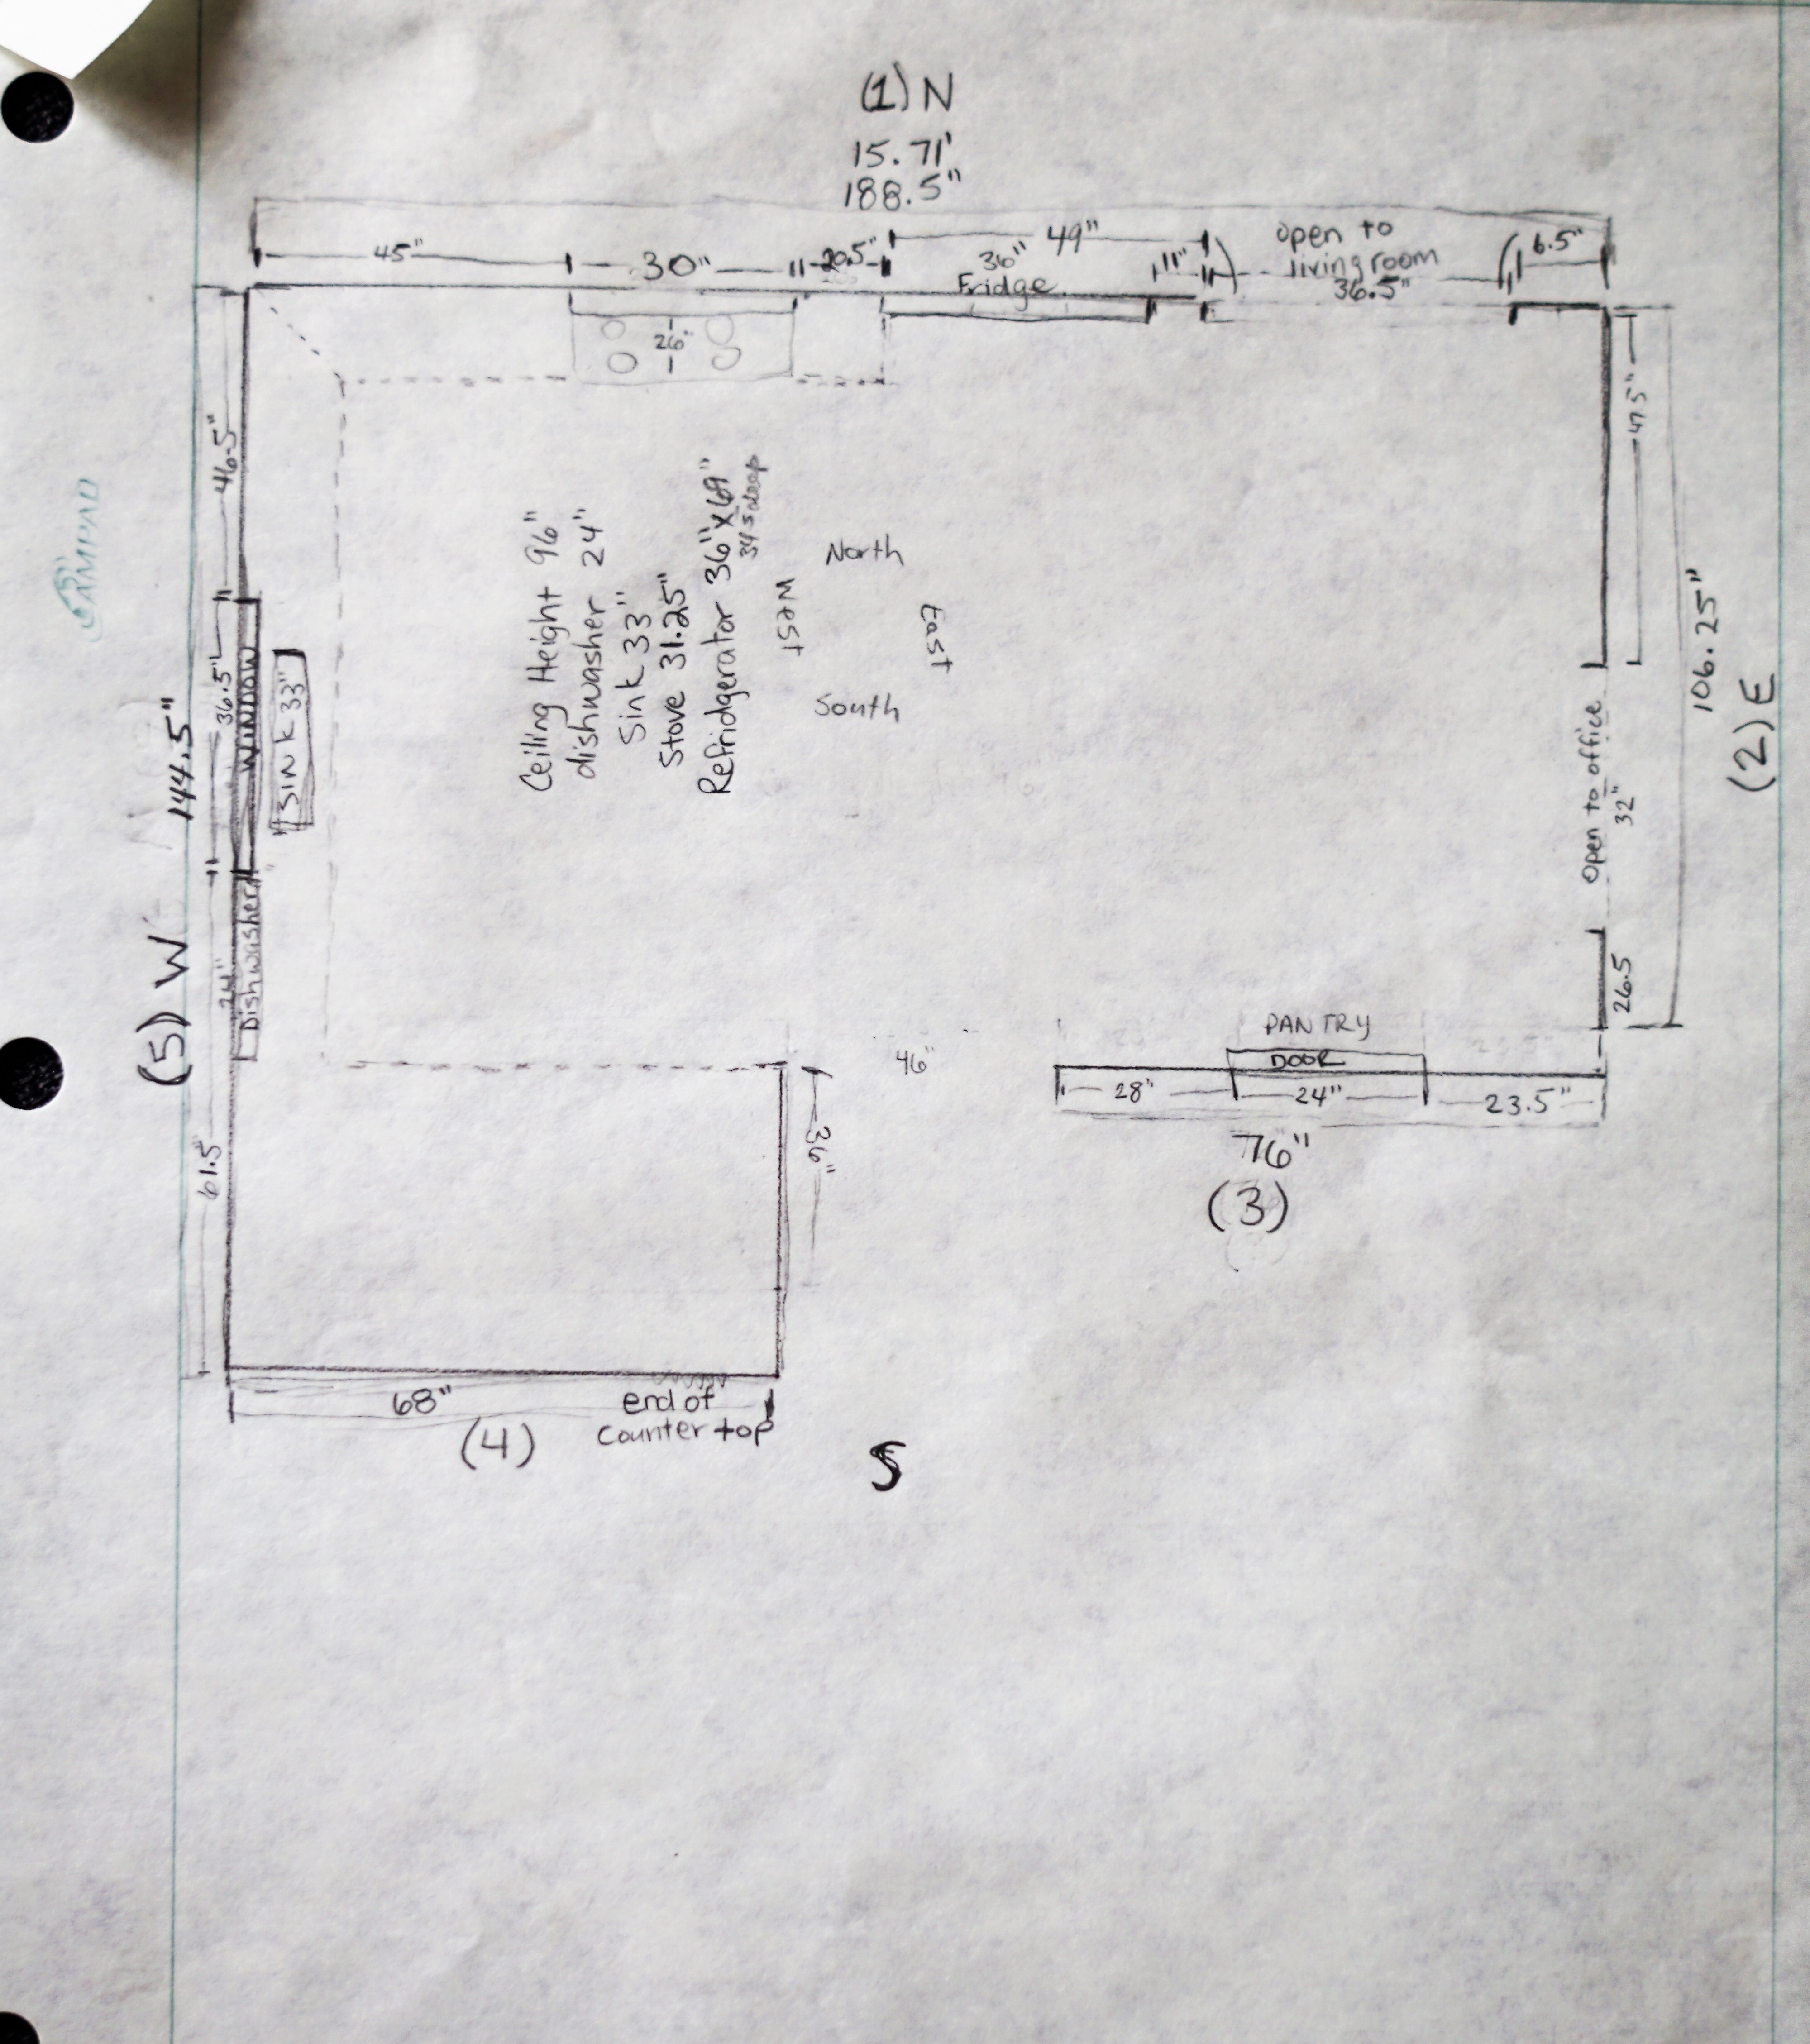
Every step in the measuring of your kitchen is crucial because you don’t want to go through the rest of the steps and have a garage full of cabinets that don’t fit in your kitchen. Also, even when you meet with the designer he/she is going strictly on your measurements to make sure everything fits. If you’re not confident in your measuring abilities, you can always hire a professional to come out and do it for you.
3. Layout Your Kitchen
If you’re using Ikea, like we did, you will create an account on their Ikea Home Planner here. Ikea is good about walking you through how to work this program, so take advantage of their resources. Just make sure to remember your username and password, and always save your work. You will need this before an Ikea kitchen specialist will even meet with you. Factor in all of the layout features you listed in step 1. For me, a built-in trash can was on the top of my list. I knew, no matter what, this feature was going somewhere in my lower cabinets. In the Home Planner, you can choose the exact cabinet/drawer, color, door position, organizational feature, and more. Get at specific as you’d like when it comes to the details of each cabinets.
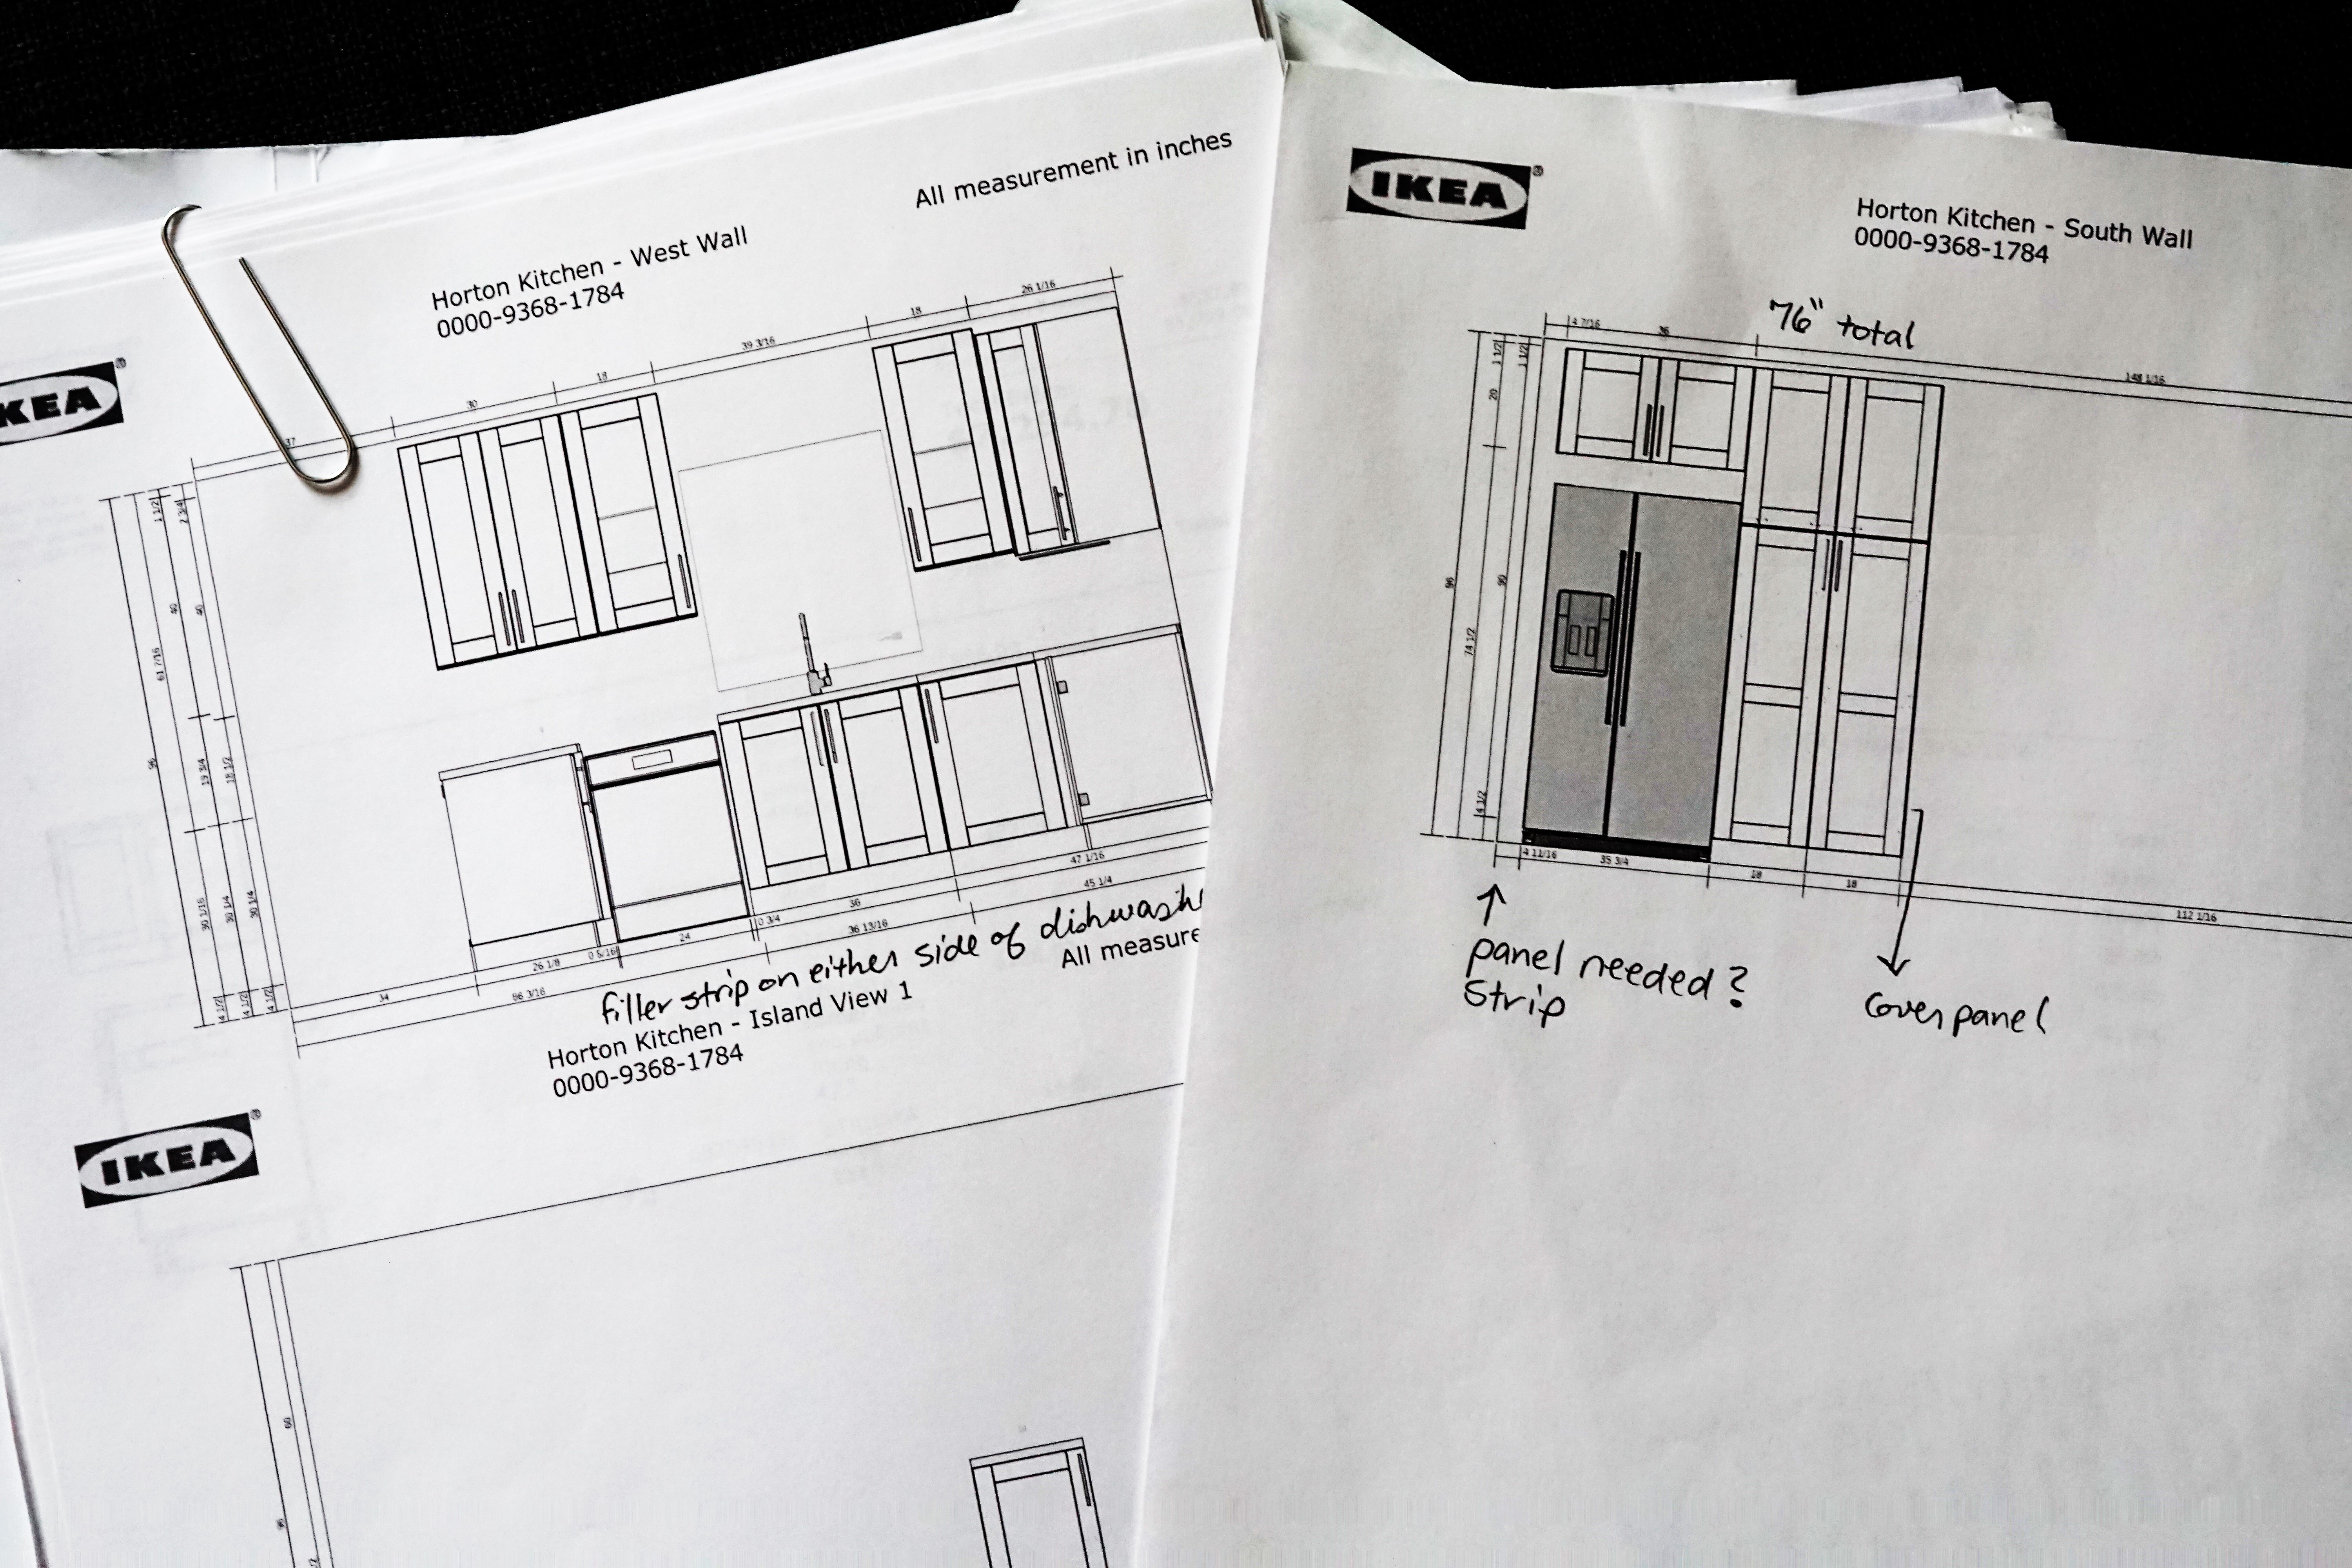
This step is time consuming. Choosing and placing each cabinet where you want it is a tedious process, especially if you have a slow internet connection. Be patient. We probably revised our kitchen 6-7 times, with many frustrations in between, before we even made the trip to Ikea.
4. Meet with Kitchen Specialist/Designer
Once you’re satisfied with the layout, you will need to meet with an Ikea specialist. We printed out everything we could from the Home Planner and had our username and password on hand. Our closest store is about 100 miles from our home, so we absolutely needed to be prepared to order a kitchen that day. We went on a weekday morning as soon as the store opened to make sure we didn’t have to wait hours to meet with a designer. Also, as Patrick mentioned here, we went during their annual kitchen event, which draws more traffic but saves you 15%. Our designer was extremely helpful and pointed out features to consider before placing our order. Her main job was to make sure everything fit properly with the measurements we gave her, so this is why step 2 is so crucial. Next week, I will be posting tips on all the little things to consider while designing your kitchen.
5. Order and Demo
After your successful 1-3 hour long meeting with your kitchen specialist, he/she will place your order item-by-item. Please pay for the shipping and have the boxes delivered right into your home. We had 156 boxes delivered and placed in our garage, and it was worth every penny. If you have it delivered, pencil in some time to itemize your boxes within the next few days. If you’re missing any items, Ikea will deliver the missing boxes for free. This is not a luxury if you take the boxes home from the store.
Knowing that your kitchen is coming, the fun part begins. Grab your gloves and hammer and start demolishing your kitchen.

If you missed our before or after reveal, make sure to check them out. Also, don’t miss Patrick’s post on about how we saved $10,000 renovating our kitchen. Using IKEA cabinets was one cost saving tip.
Make sure to subscribe so that you don’t miss a post, and follow us on Instagram and Facebook for some behind-the-scenes.
