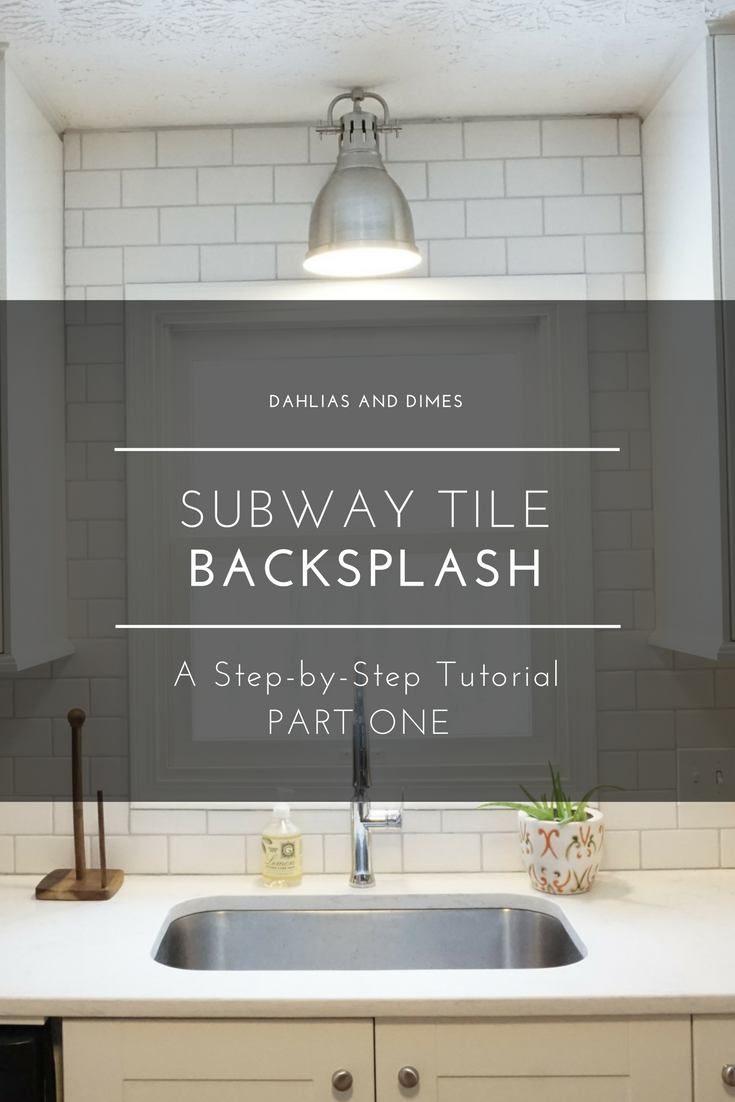
A backsplash is one of those elements that can take your kitchen to the next level. It instantly makes a kitchen stand out when it’s done right. Luckily, it doesn’t have to cost you a fortune. Check out our kitchen budget break-down here. It was one of the most affordable projects in our kitchen renovation, yet I think it’s the one thing that makes our kitchen shine the most.
I’m here to guide you through a two-part series on how we did this ourselves and saved hundreds.
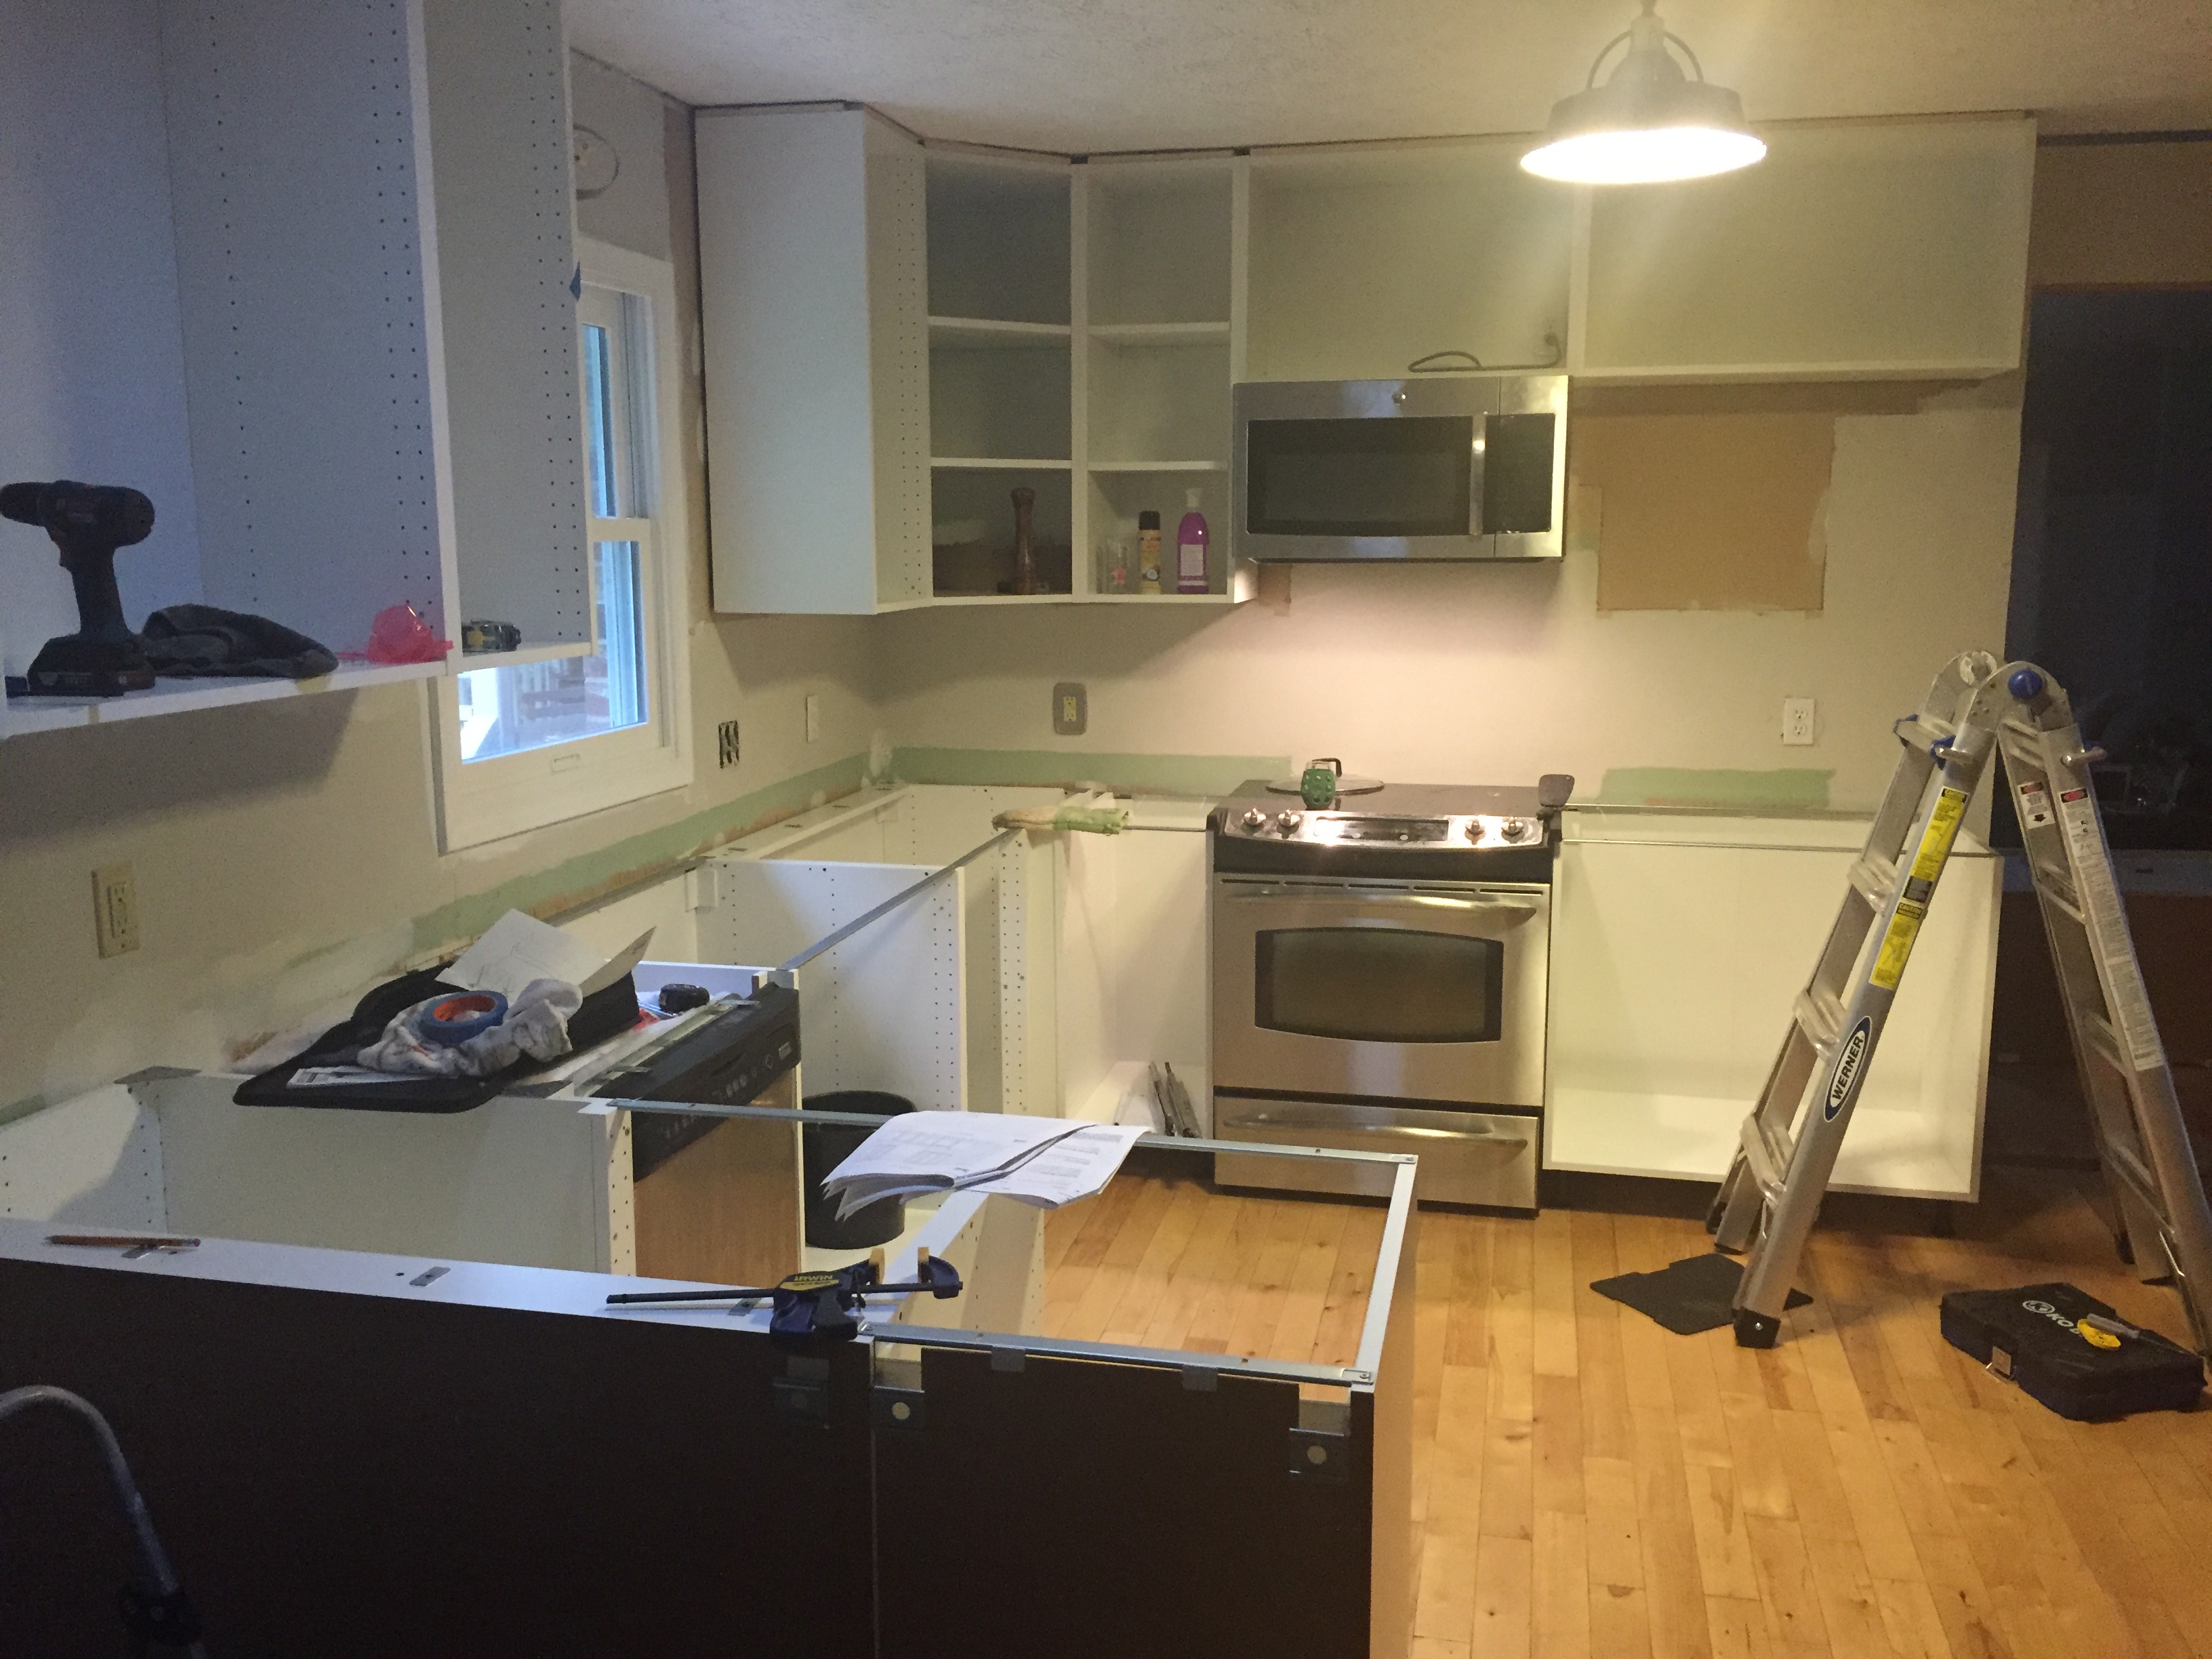
Before
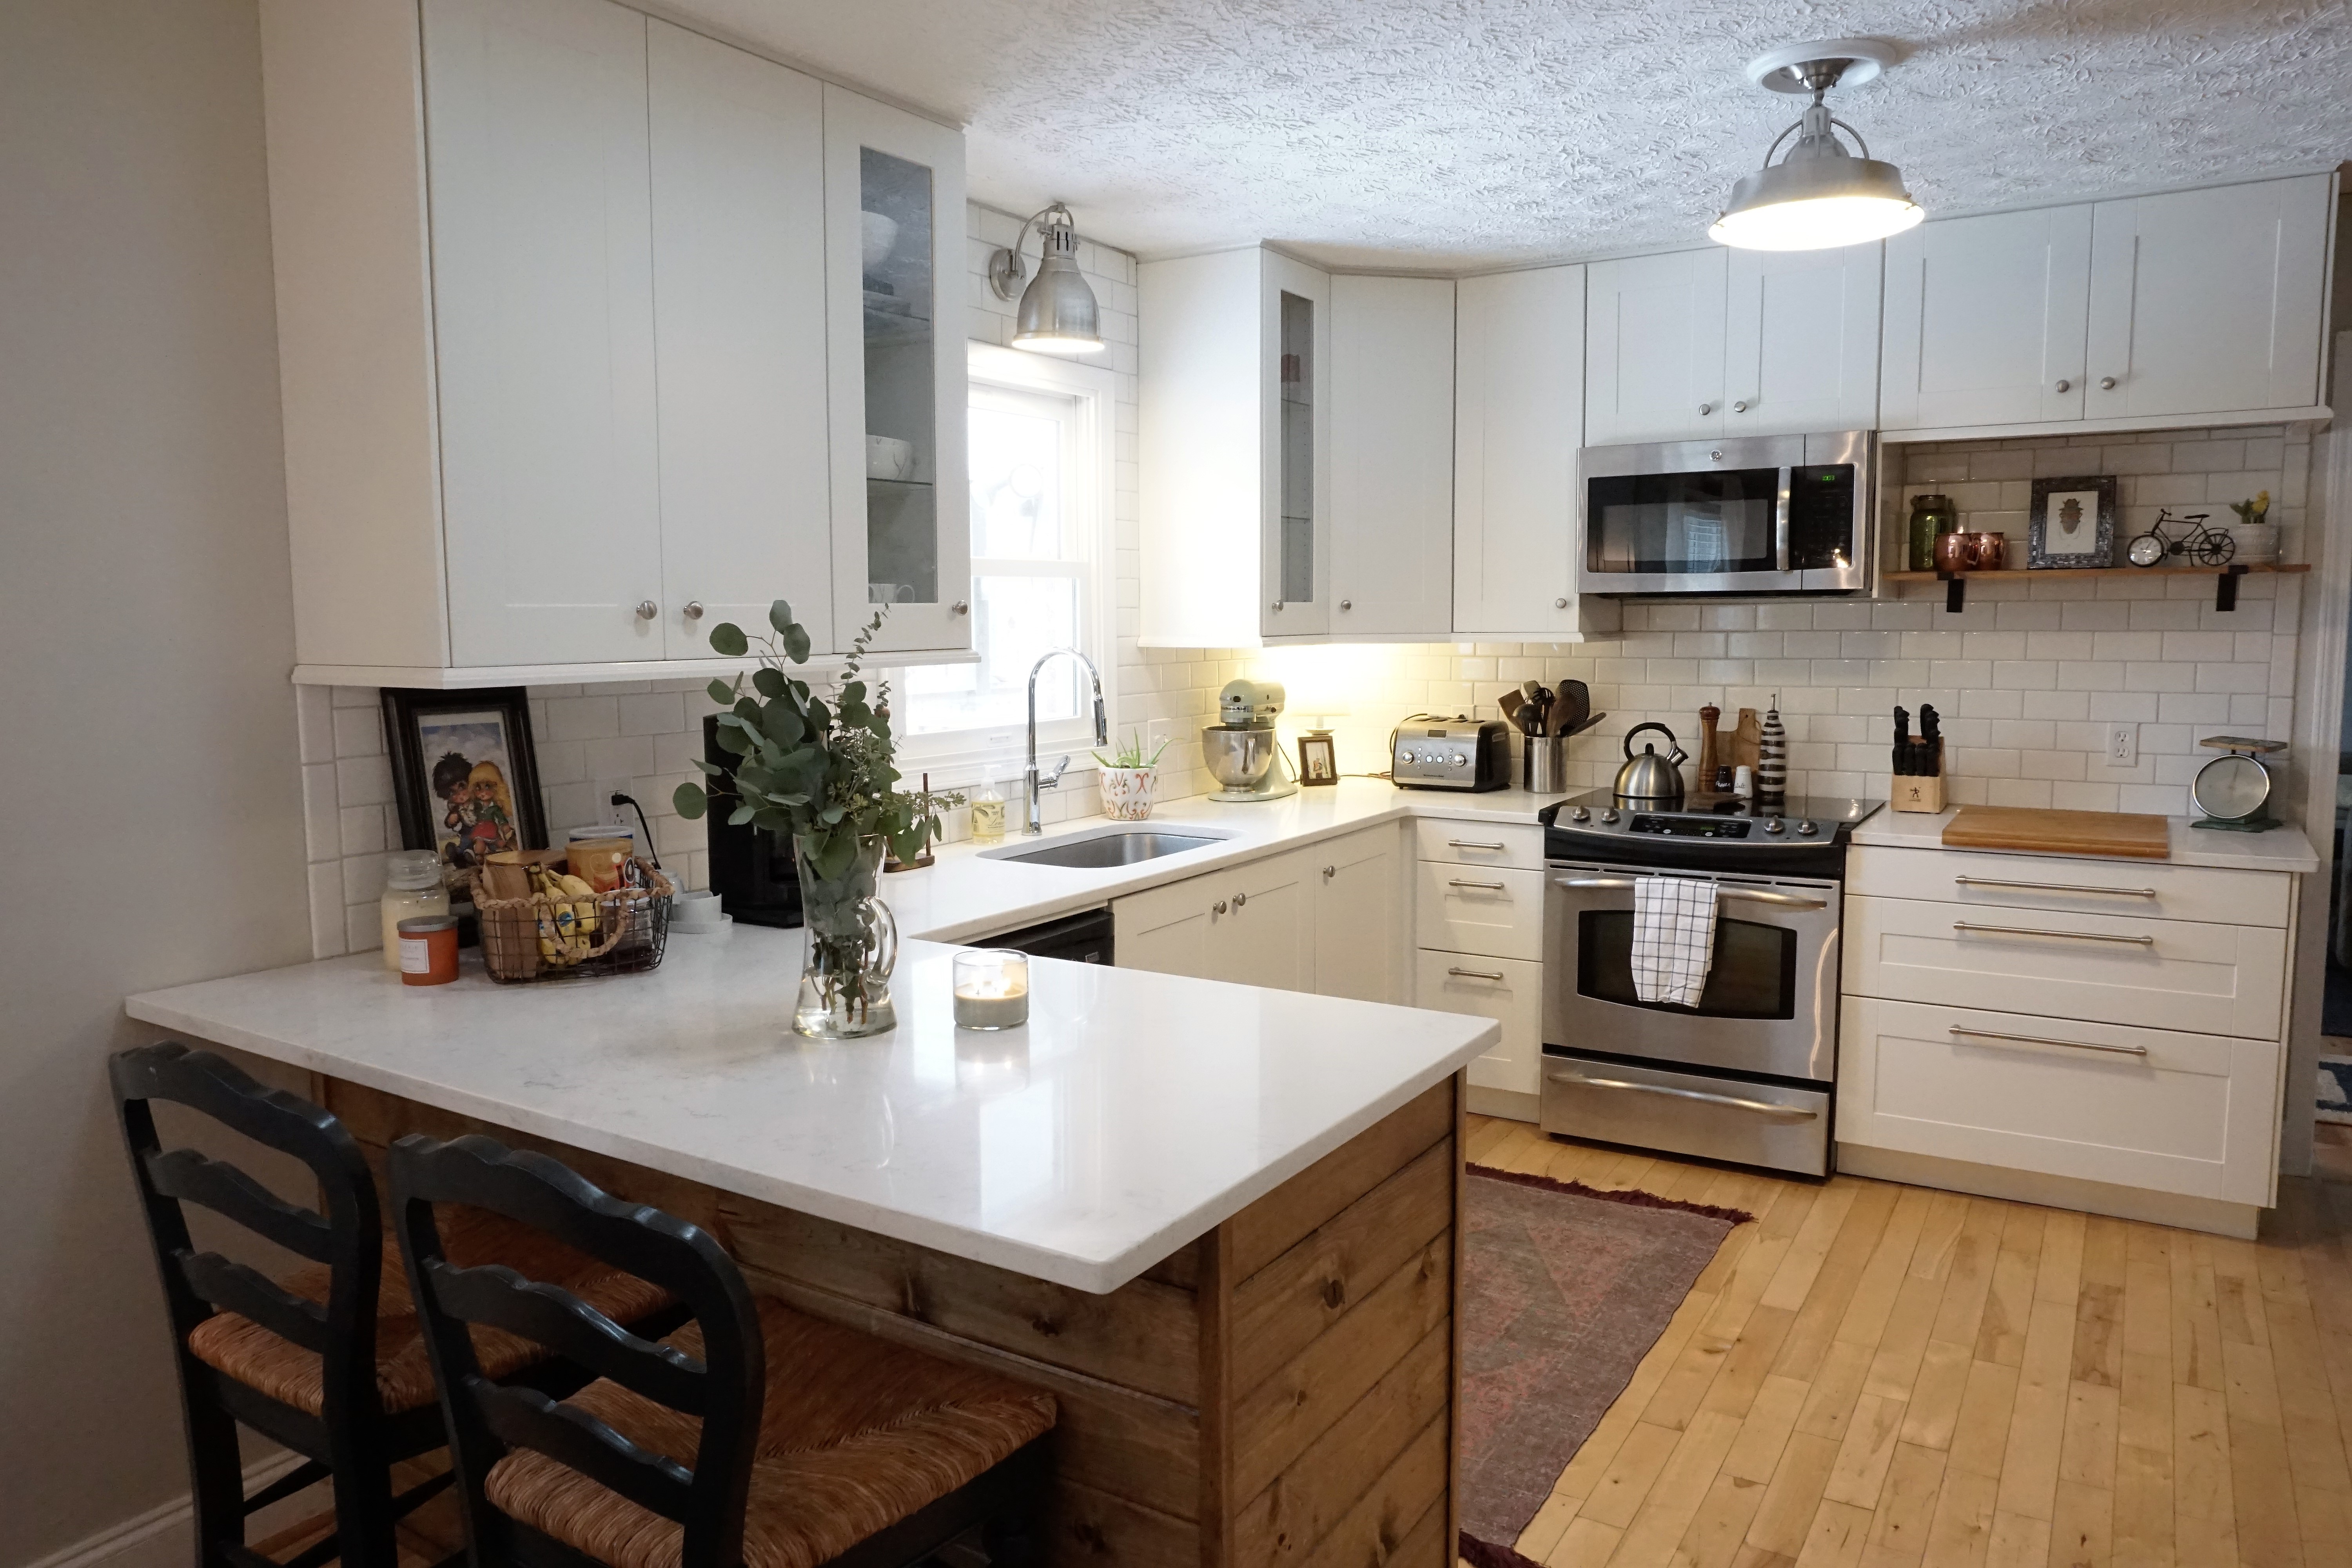
After
Check out our complete kitchen reveal here.
Our first step was choosing tile. I immediately knew I wanted subway tile. For one, it’s classic. I figured I would never grow old of it, and it would stay “in-style” for years to come, which helps with resale. Second, it’s possibly the most affordable tile on the market. It was an easy choice for me.
Step One: Gather Your Supplies
As I was doing my research, I knew it was a project we could do ourselves, but I was having a difficult time finding a detailed, all-in-one supply list. I’ve broken it up to show the specific tools and tiling supplies to hopefully help you when you prepare for this project. Though this is a two-day project, you absolutely don’t want to start this project without having every tool necessary to finish it.
These are the specific products we personally used, but they can be adjusted to fit your color and style preference.
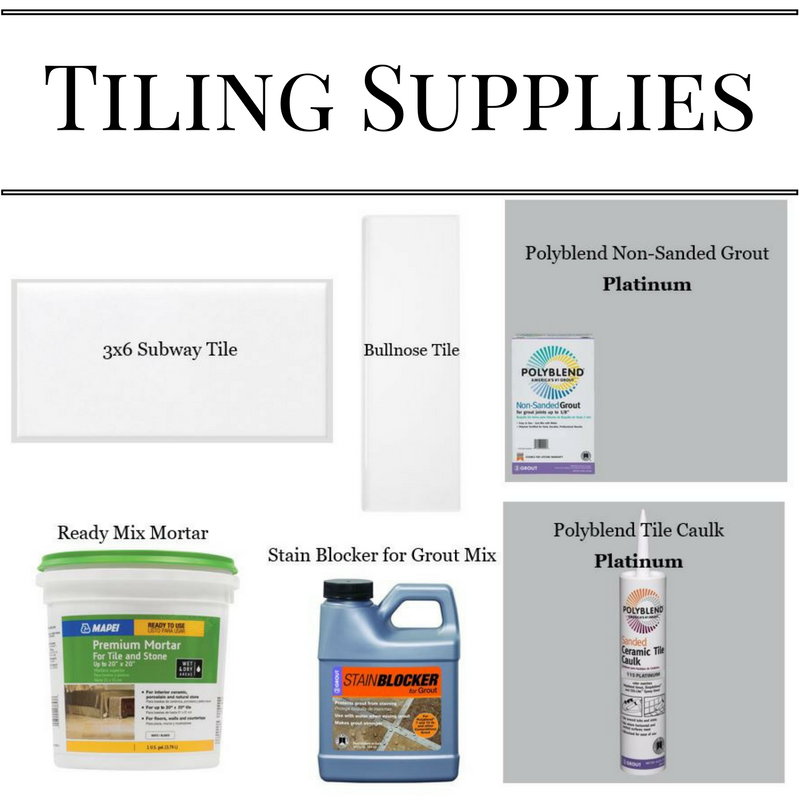
Subway Tile / Bullnose Tile / Grout / Mortar / Sealer / Caulk
Links are affiliated to help with your shopping experience.
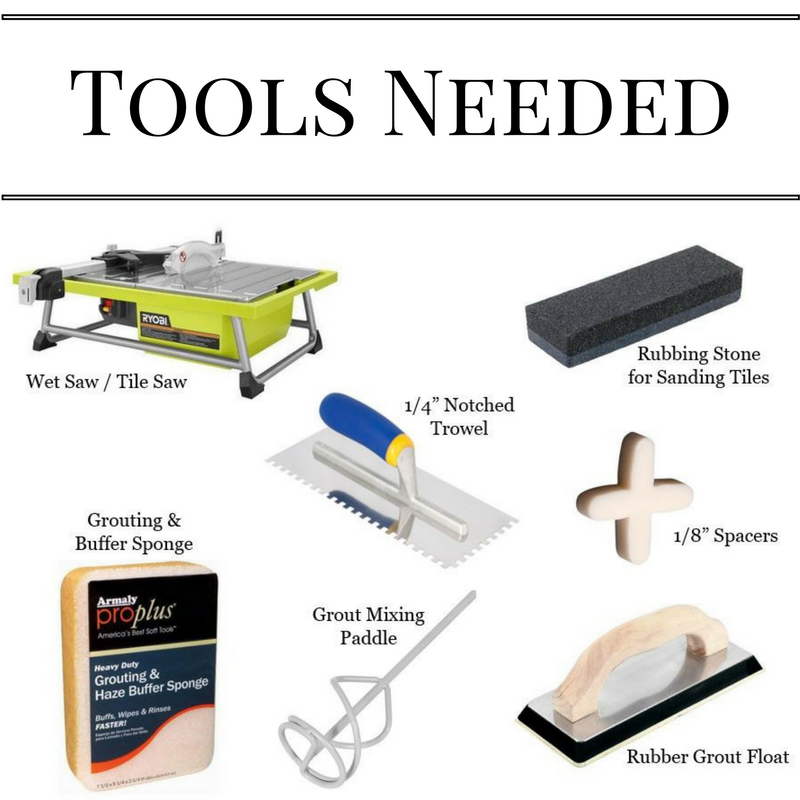
Wet Saw / Rubbing Stone / Trowel / Sponge / Spacers / Mixing Paddle / Grout Float
Not Pictured: Bucket / Paper Towels / Protective Tarp
Step Two: Prep Your Work Area
You will need to prep your space by adding a tarp or cardboard over your countertops to protect your surface. You’ll notice in pictures below that we ignorantly did not do this on our brand new $4,000 countertops. We were scraping little pieces of grout off our countertop for months!
Also, scrape, fill, and sand any uneven surfaces. This is a vital step to ensure that your tiles lay flat on your wall. Then wipe down your walls with a damp cloth to remove any residue.
Step Three: Make A Plan
If you search a “How-To” on subway tile backsplash, you will get one of two pieces of advice on where to begin: in the corner or at the ends of your cabinets. We had two different methods for each tiled wall.
Method 1 – Stove Wall
We figured that it would be best to leave the small, awkward cuts for the corner rather than at the beginning of our cabinets where everyone could see, so we started where the cabinets begin and worked our way in. This allowed us to have full pieces of tile on the large, more noticeable part of our wall. It left the smaller cuts to the corner where they’re more discreet.
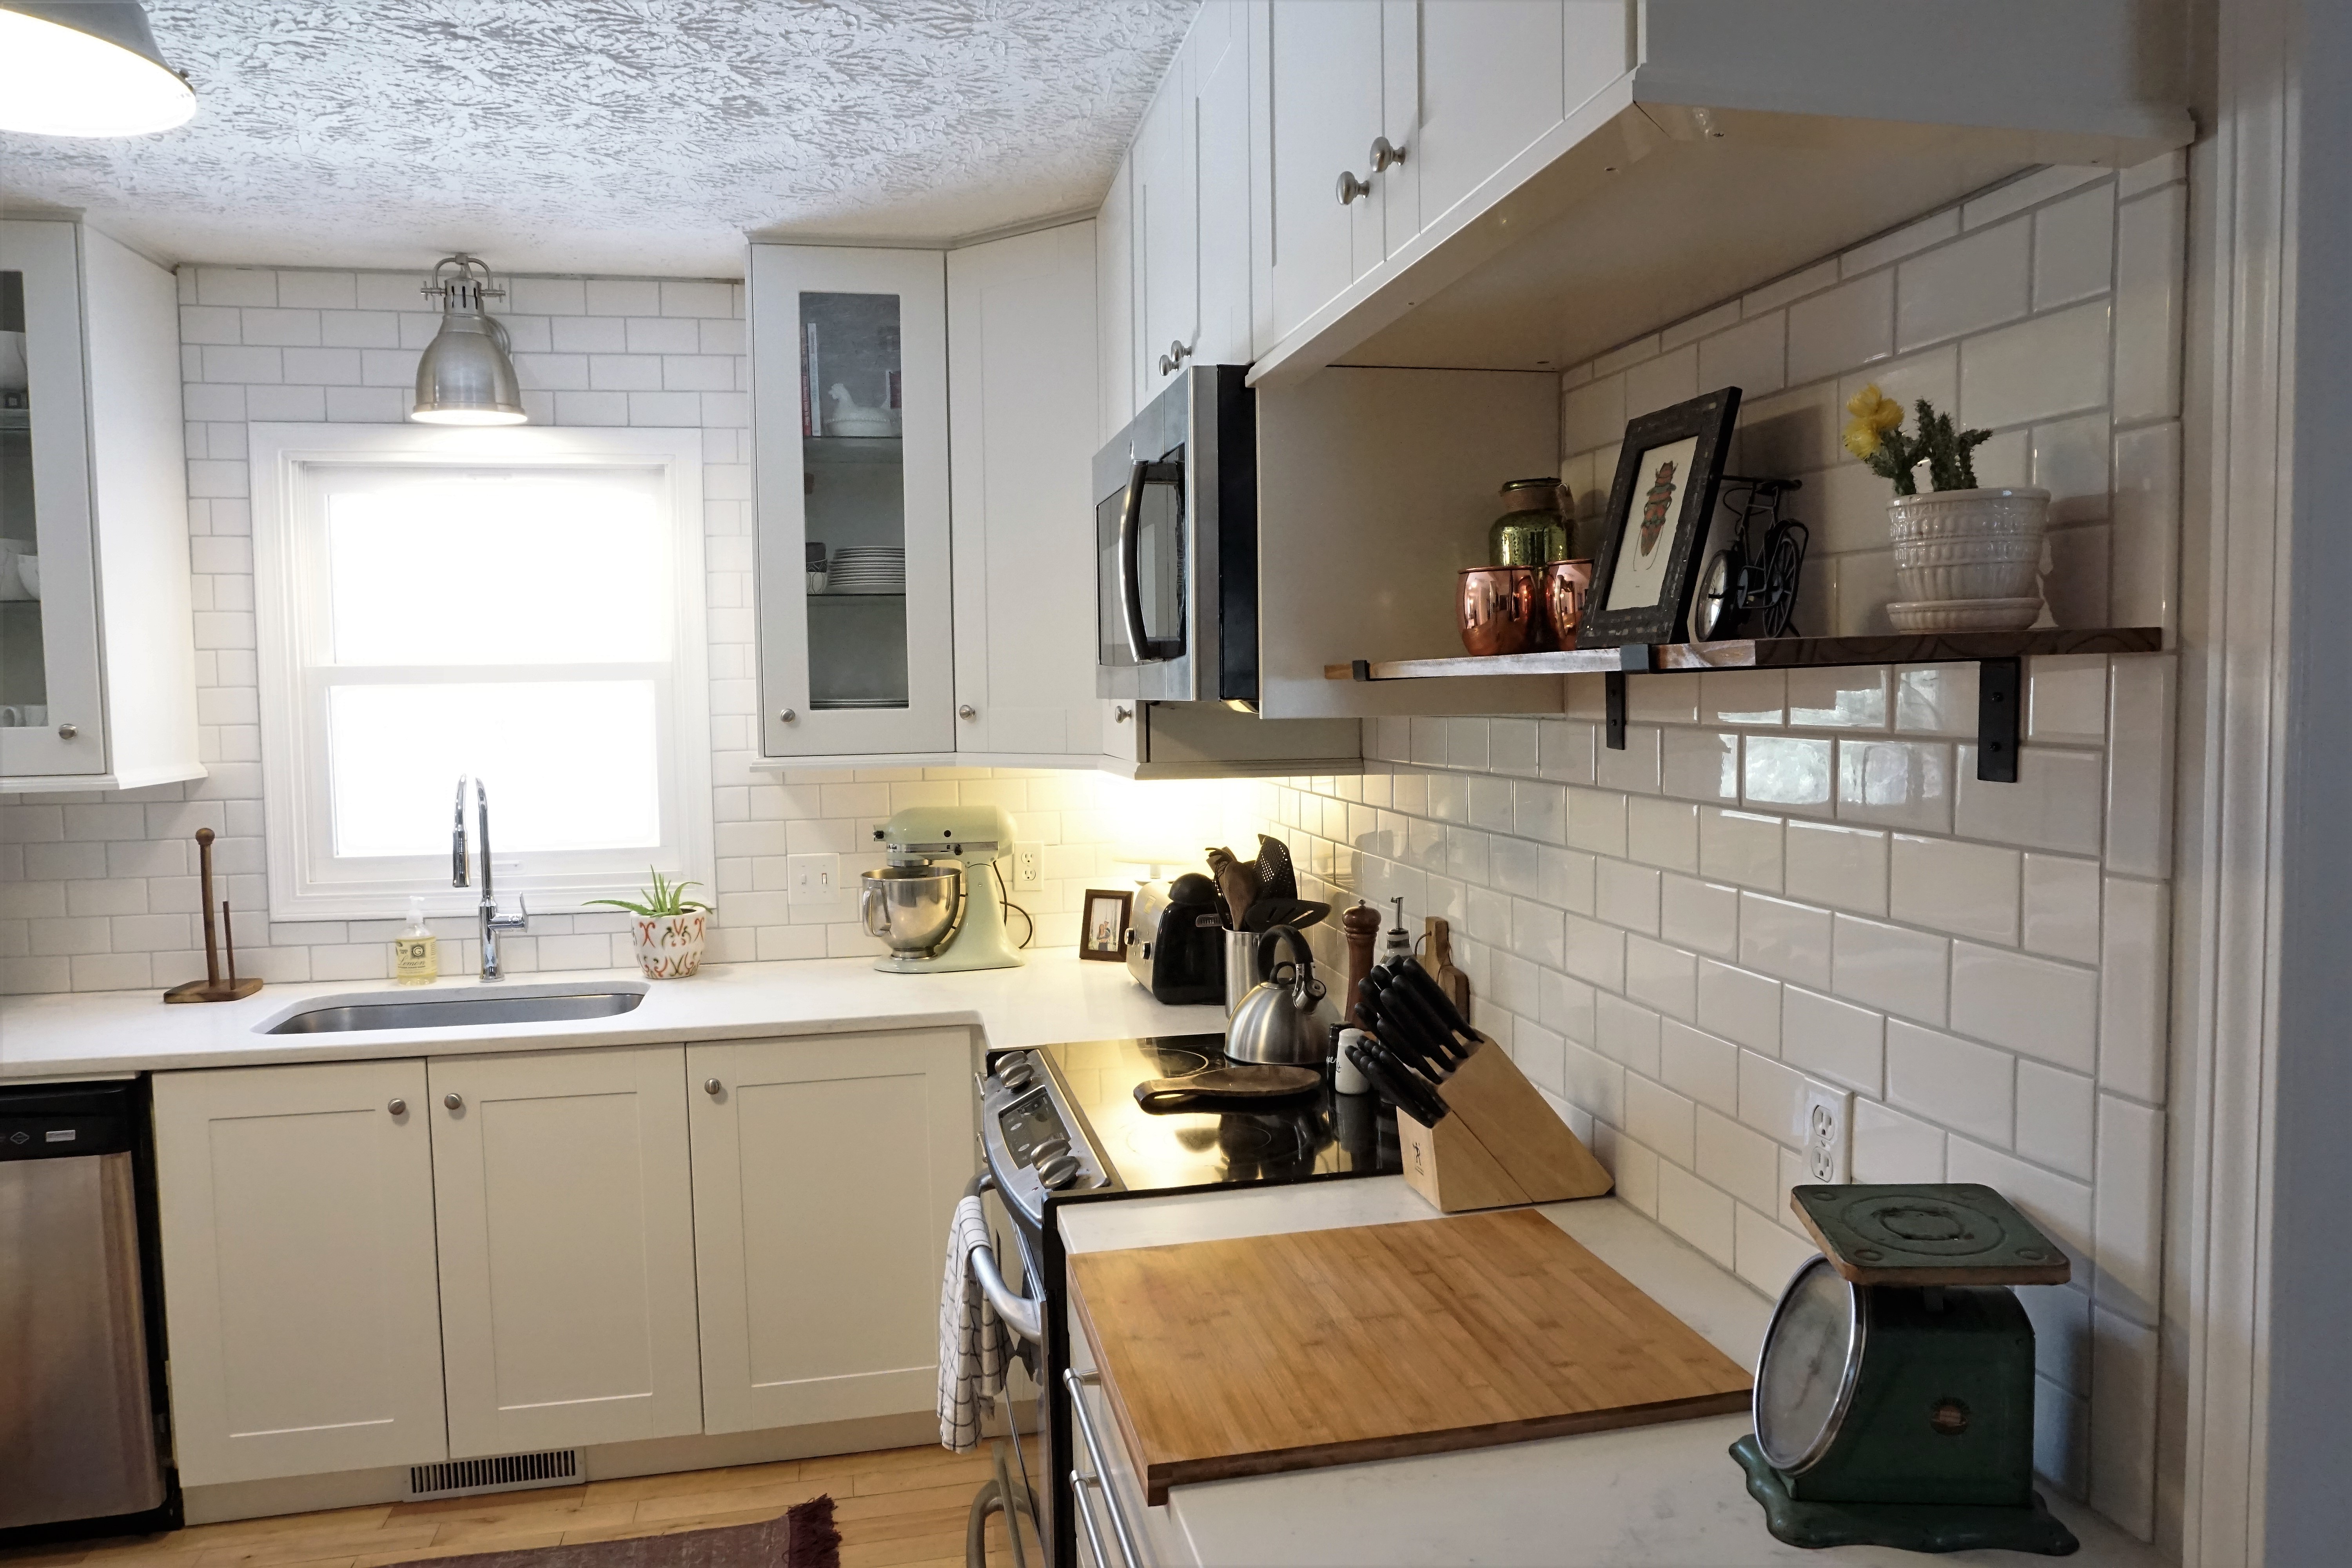
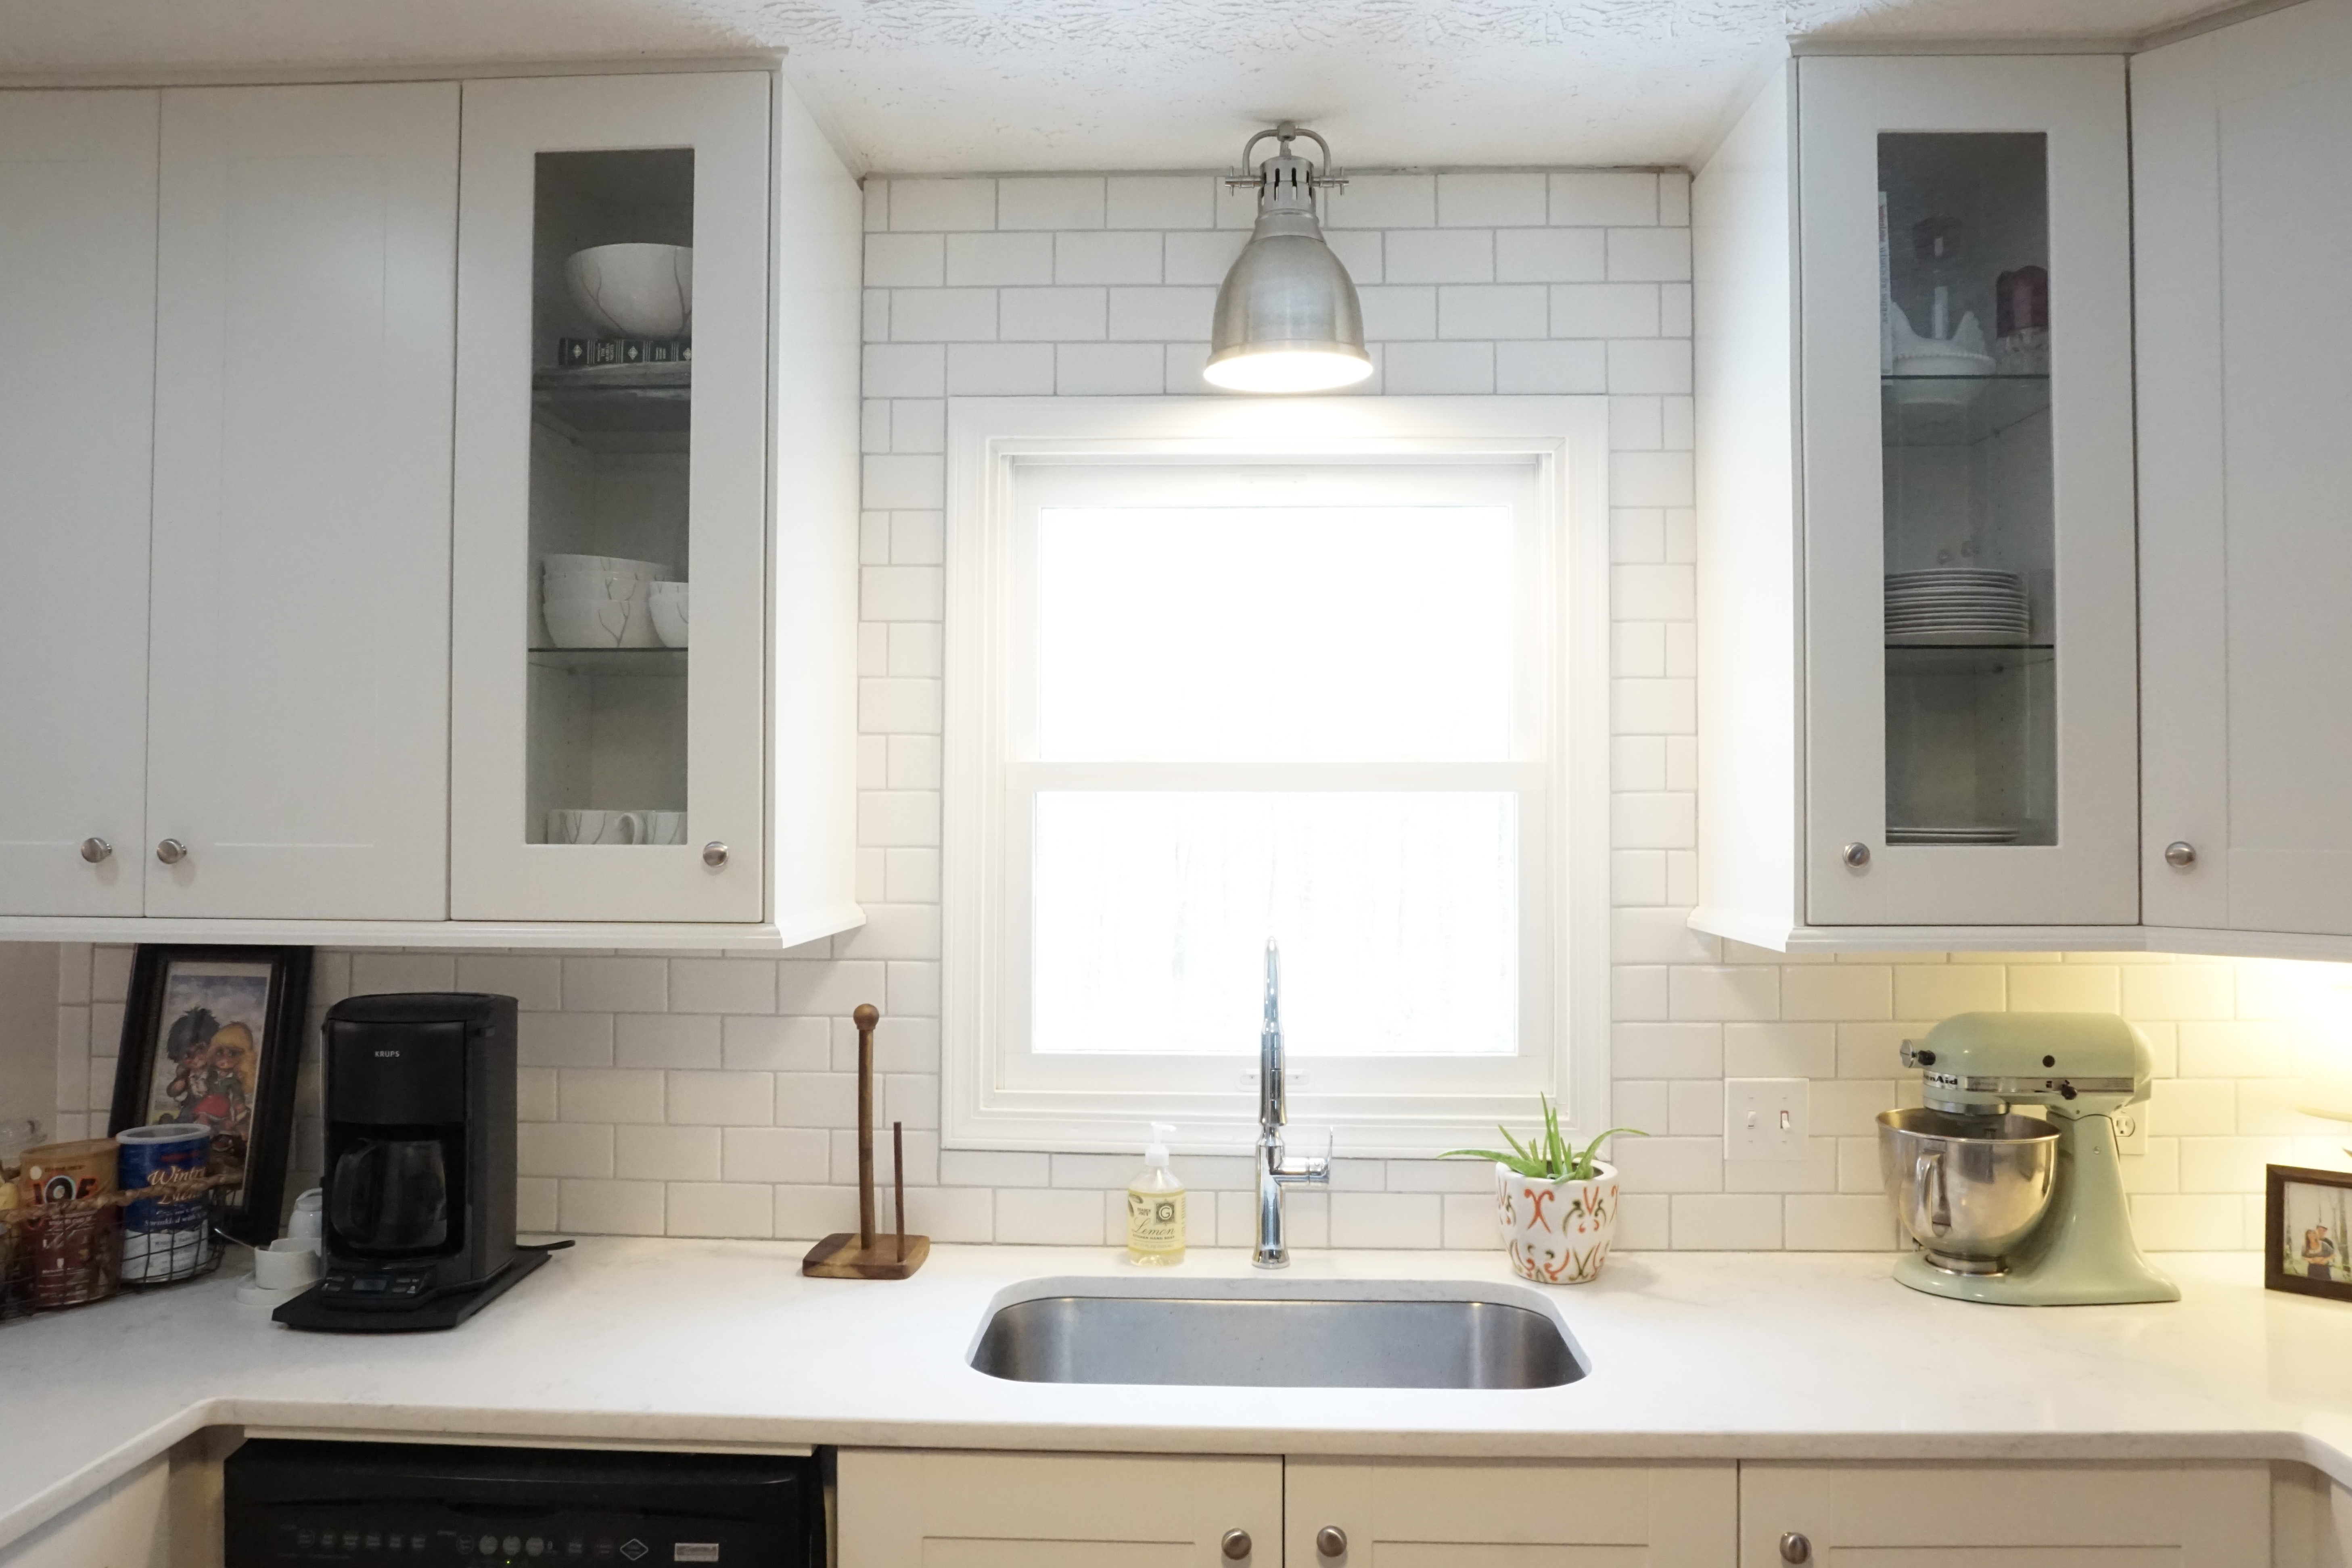
Method 2 – Window Wall
Unlike the stove wall, this wall has a feature point: the window and sconce. We knew that the tiles needed to be centered on the sink and around the window in order to look well-done. We laid our first tile right behind the faucet and worked our way up and around the window to the ceiling. After that, we went to the left and right, and, luckily, the tiles ended up being fairly even at the end of the cabinets.
In conclusion, think about these two things when making your plan: (1) what is your feature point and (2) where is the best place to disguise smaller cuts? Each wall may take a different course of action.
Step Four: Lay Your Tiles
Now that you have an action plan you can start laying the tiles! It absolutely helps to have two people for this job. Patrick cut the tiles while I laid them. Even with two people we were up well past midnight finishing this step. It’s the most time-consuming, yet the most important part.
I used pre-mixed mortar since it wasn’t a huge project. It’s a little more costly than powdered mortar, but it’s definitely worth not having to add just enough water to find the perfect consistency. You will still need to give it a good mix with your mixing paddle attachment and drill before using.
To Start:
If starting at the end of your cabinets, you can use a bullnose tile for a finished look. This is optional, but I think it gives the cleanest look. On the stove wall, I started with drawing a straight line from the upper cabinet to the countertop. I applied mortar and laid a vertical line of bullnose tiles with my 1/8″ spacers in between to get me started.
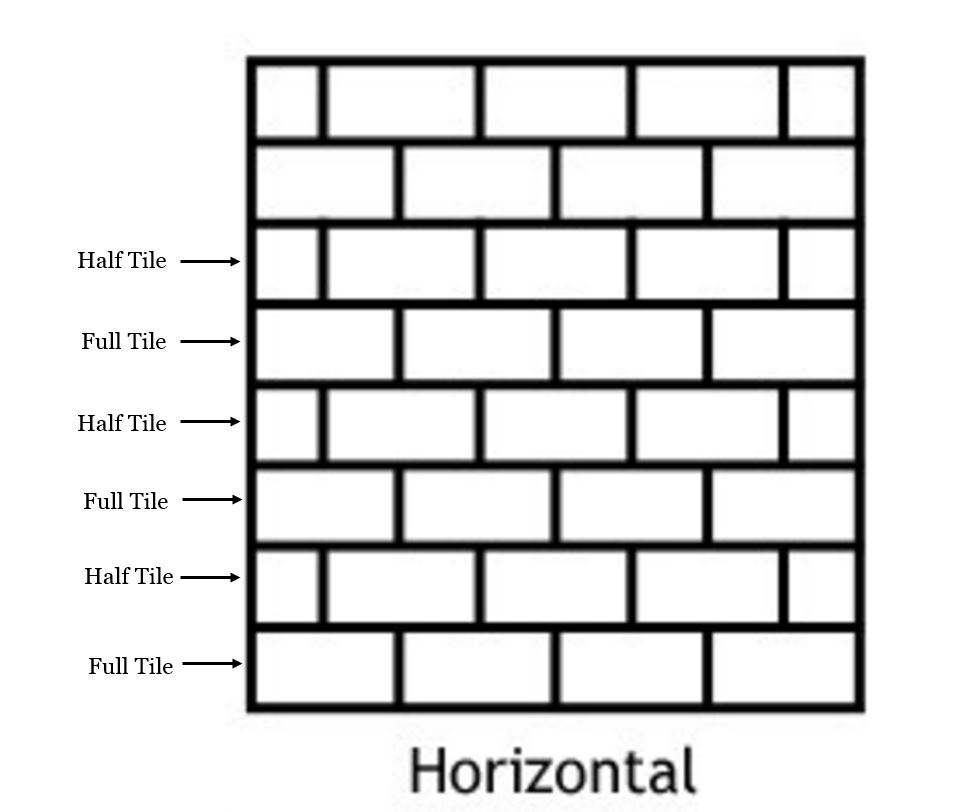
Establishing the Pattern:
The classic subway tile pattern was intimidating to me, but it’s so simple. You’ll want to take several full tiles and simple cut the in half. At the point in which you start, lay a full tile then a half tile on top. Repeat that pattern on the first vertical row. This sets your pattern for the rest of the wall.
Applying Mortar:
Using your notched trowel, apply a layer of mortar to a small 1’x1′ area. (This doesn’t have to be exact. The point is to keep your working-area small.) Go back with the notched end and make rainbow-like shaped lines in your mortar without taking too much off. Lay the tiles from the bottom up, making sure your bottom row is level.
Apply your spacers on all sides of the tile, even at the bottom on your countertop, to insure uniformity. When your grout lines are uneven, it makes the finished product look more hand-made rather than sleek and uniform. You can remove these spacers once you move to the next area. They can be difficult to remove if you let the mortar set completely.
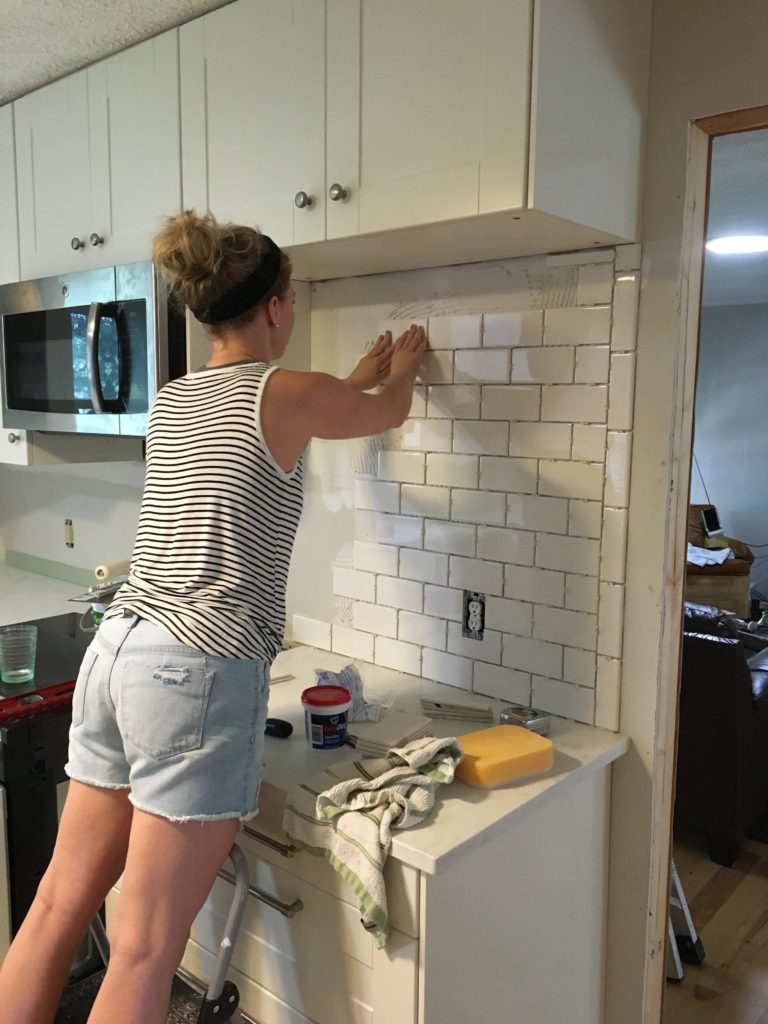
Press tiles into mortar snugly. Wipe off any excess mortar from your tiles with a damp sponge or towel. The mortar will be nearly impossible to remove if you let it set on the tiles.
For smaller tiles or tighter areas, you can apply the mortar directly to the back of the tile.
Step Five: Making the Cuts
This is where your wet saw and rubbing stone come in handy. When you get to an outlet, place the tile in the area and roughly mark where the horizontal and/or vertical cuts need to be made. This doesn’t have to be exact since your outlet cover will be covering the edges, but you still need to try to get it as close as possible.
We did not have a tile marker, but it would be extremely handy while making the cuts. Patrick tried using regular markers and pencils, but the marks kept running off with the water from the wet saw. Luckily, we had a friend with a wet saw, and he graciously let us borrow it for our project. You can either rent or purchase one from about $80+.
Once you made your cut, smooth the edges with your rubbing stone. They are specifically made for ceramic tiles.
Disclaimer: A wet saw worked just fine for us, but you may find that a Rip Ceramic Tile Cutter may work best for you.
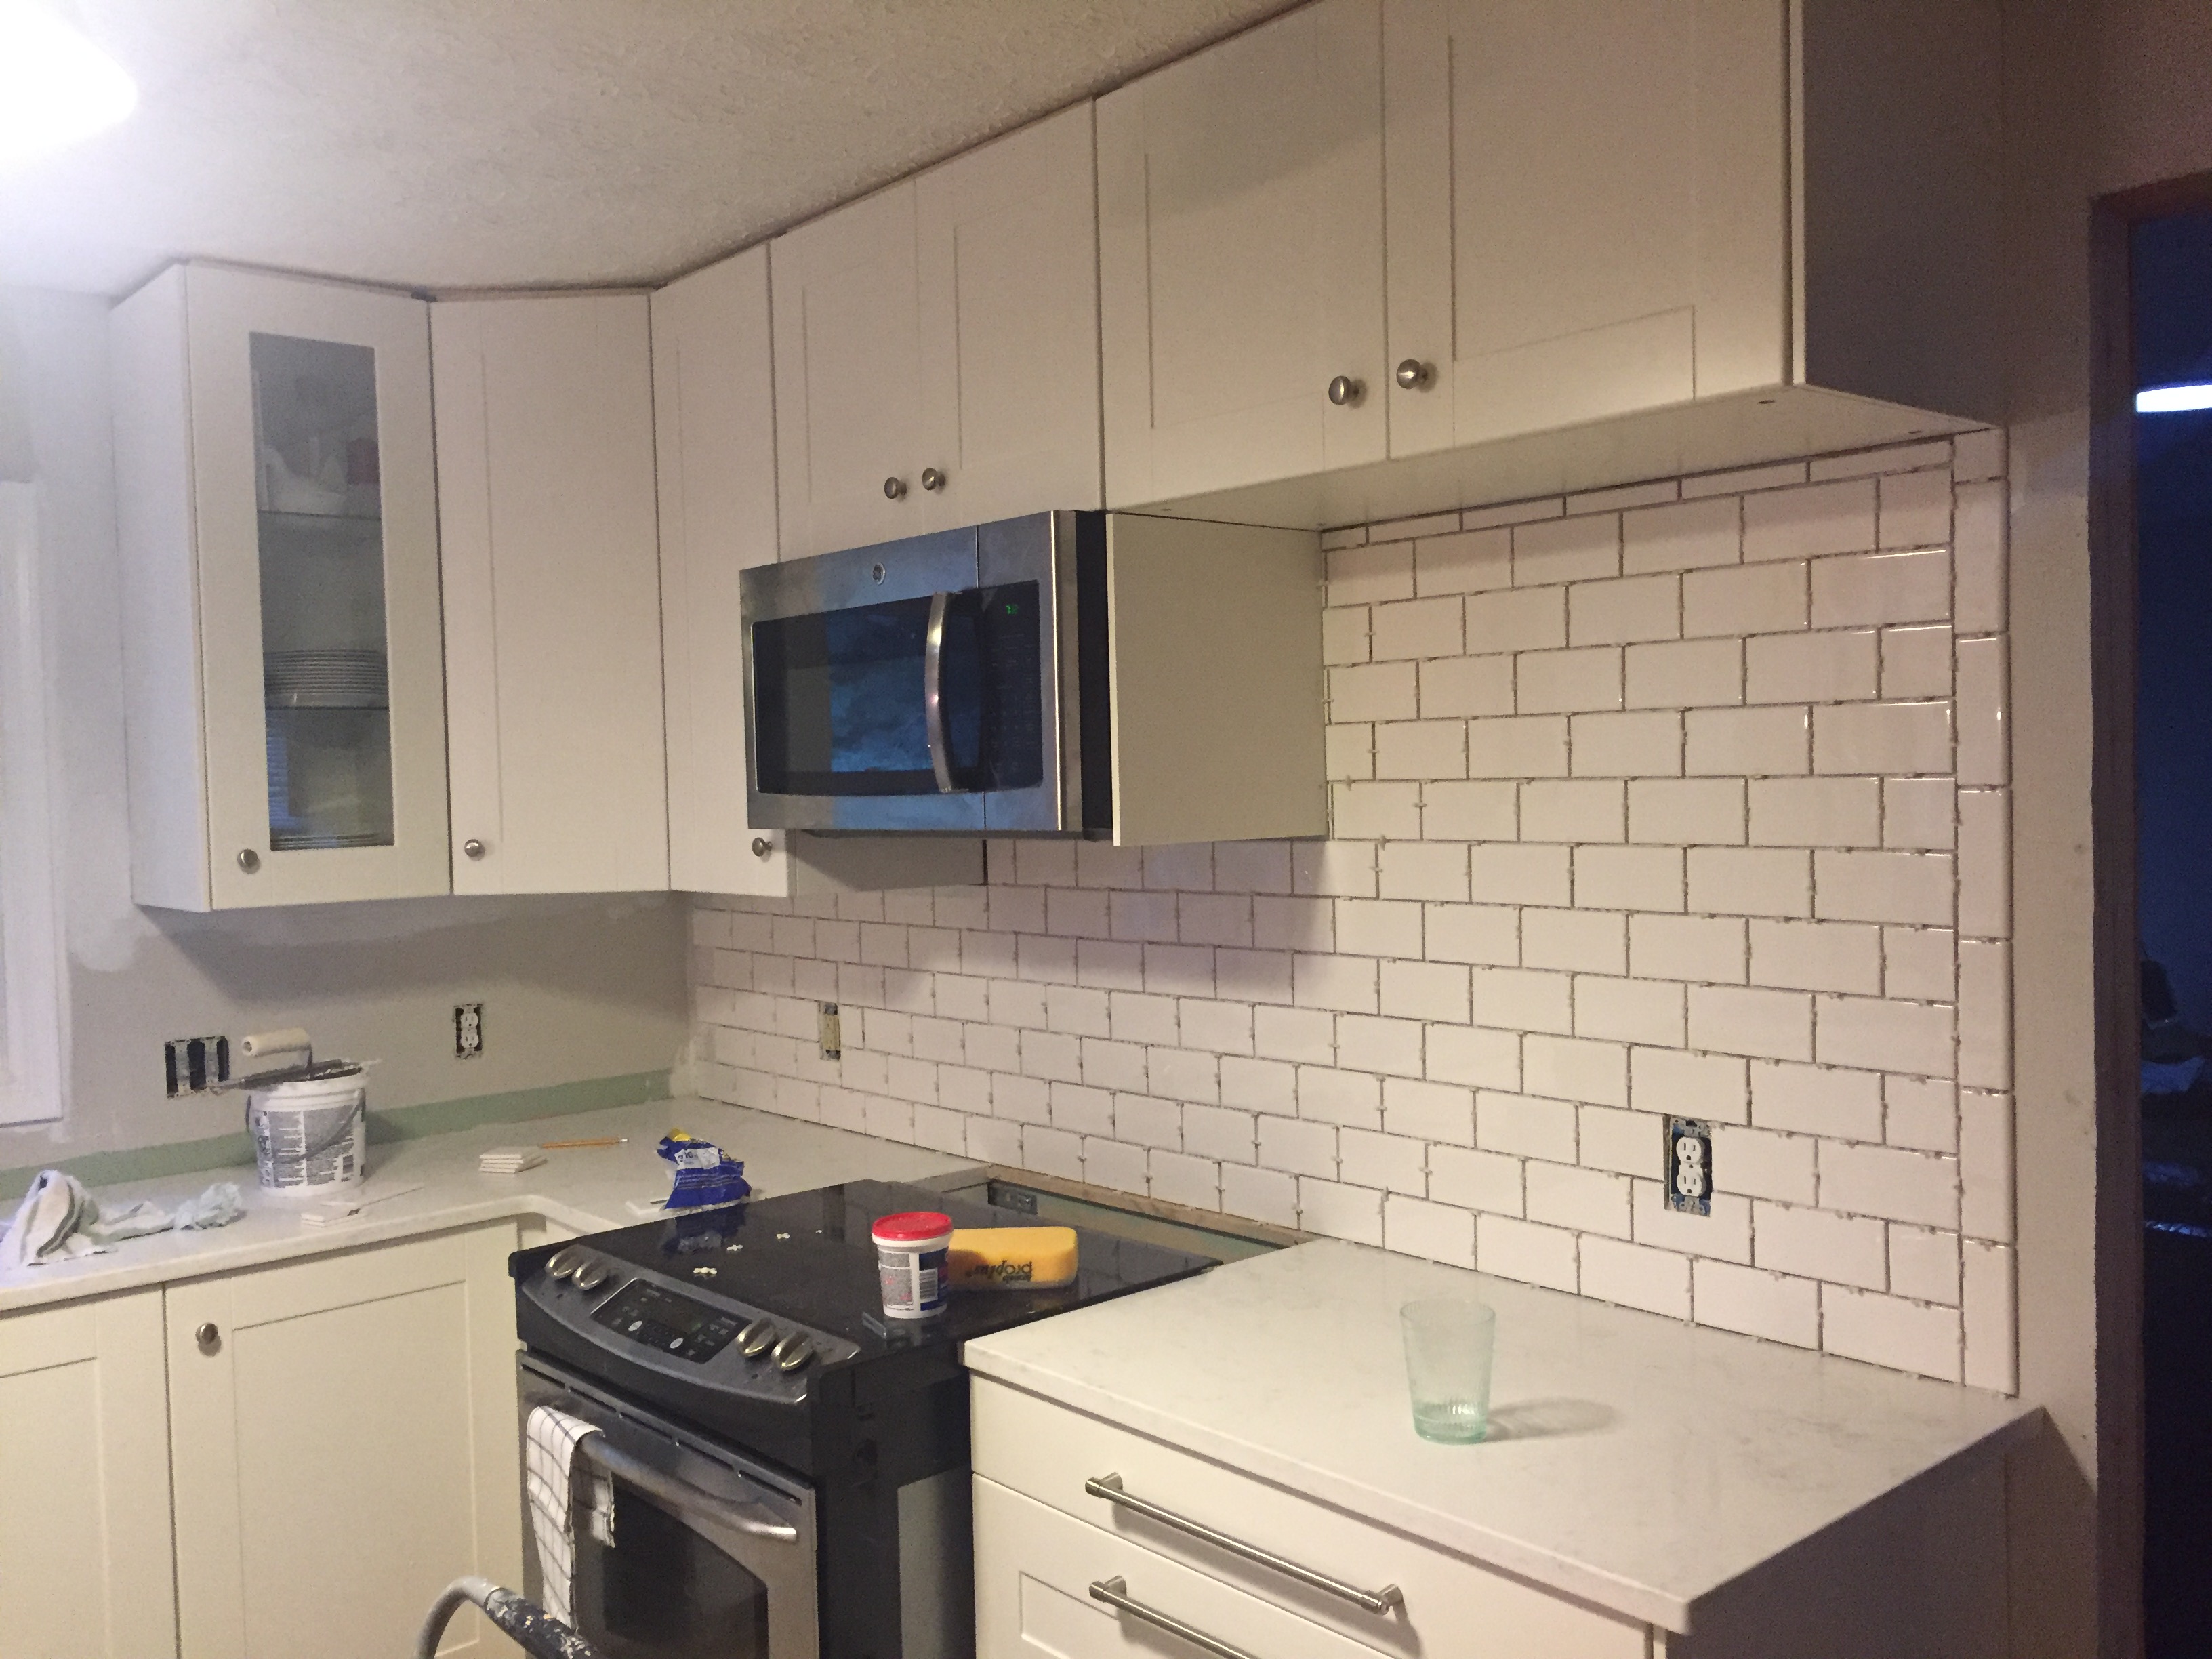
Calling It A Day
Once you have all your tiles in place, you need to let the mortar set completely before adding the grout. We let it set over night. Most directions call for at least 24 hours. Applying the grout can be a little rough on the tiles, so the mortar needs to be absolutely dry so that the tiles do not budge when applying the grout.
