If you’re new around here, welcome. I’m Diana, and my husband and I packed up our new baby and SC home almost a year ago and moved to a quaint, cozy home in East Tennessee. We’ve been working hard since then to make this home our own all while being new parents. Welcome to week 4 of the One Room Challenge where I’m sharing our DIY modern, vintage-inspired kitchen. Here’s the progress from the previous weeks (week one, week two, week three, week four).
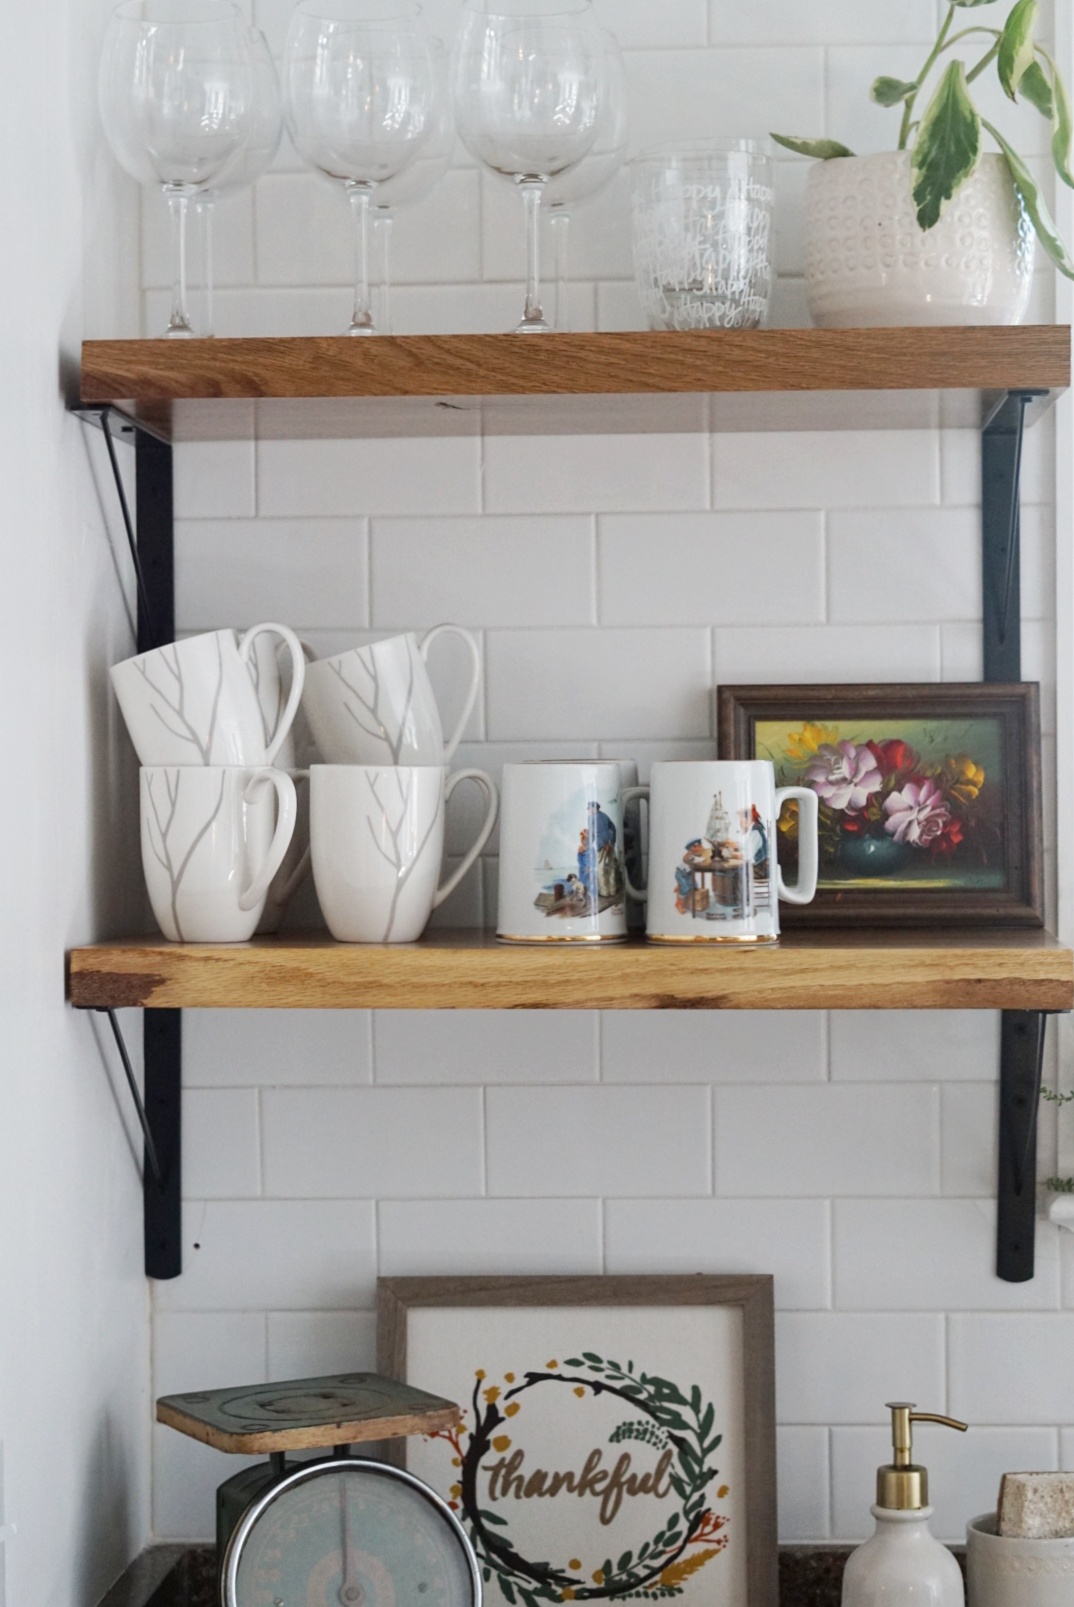
The most anticipated (and final) feature of our kitchen is DONE! I knew as soon as we moved into this house that this wall needed open shelves. After hours of pinning my favorite open shelf designs, types of wood, color, size, and everything in between, we have a finished product.
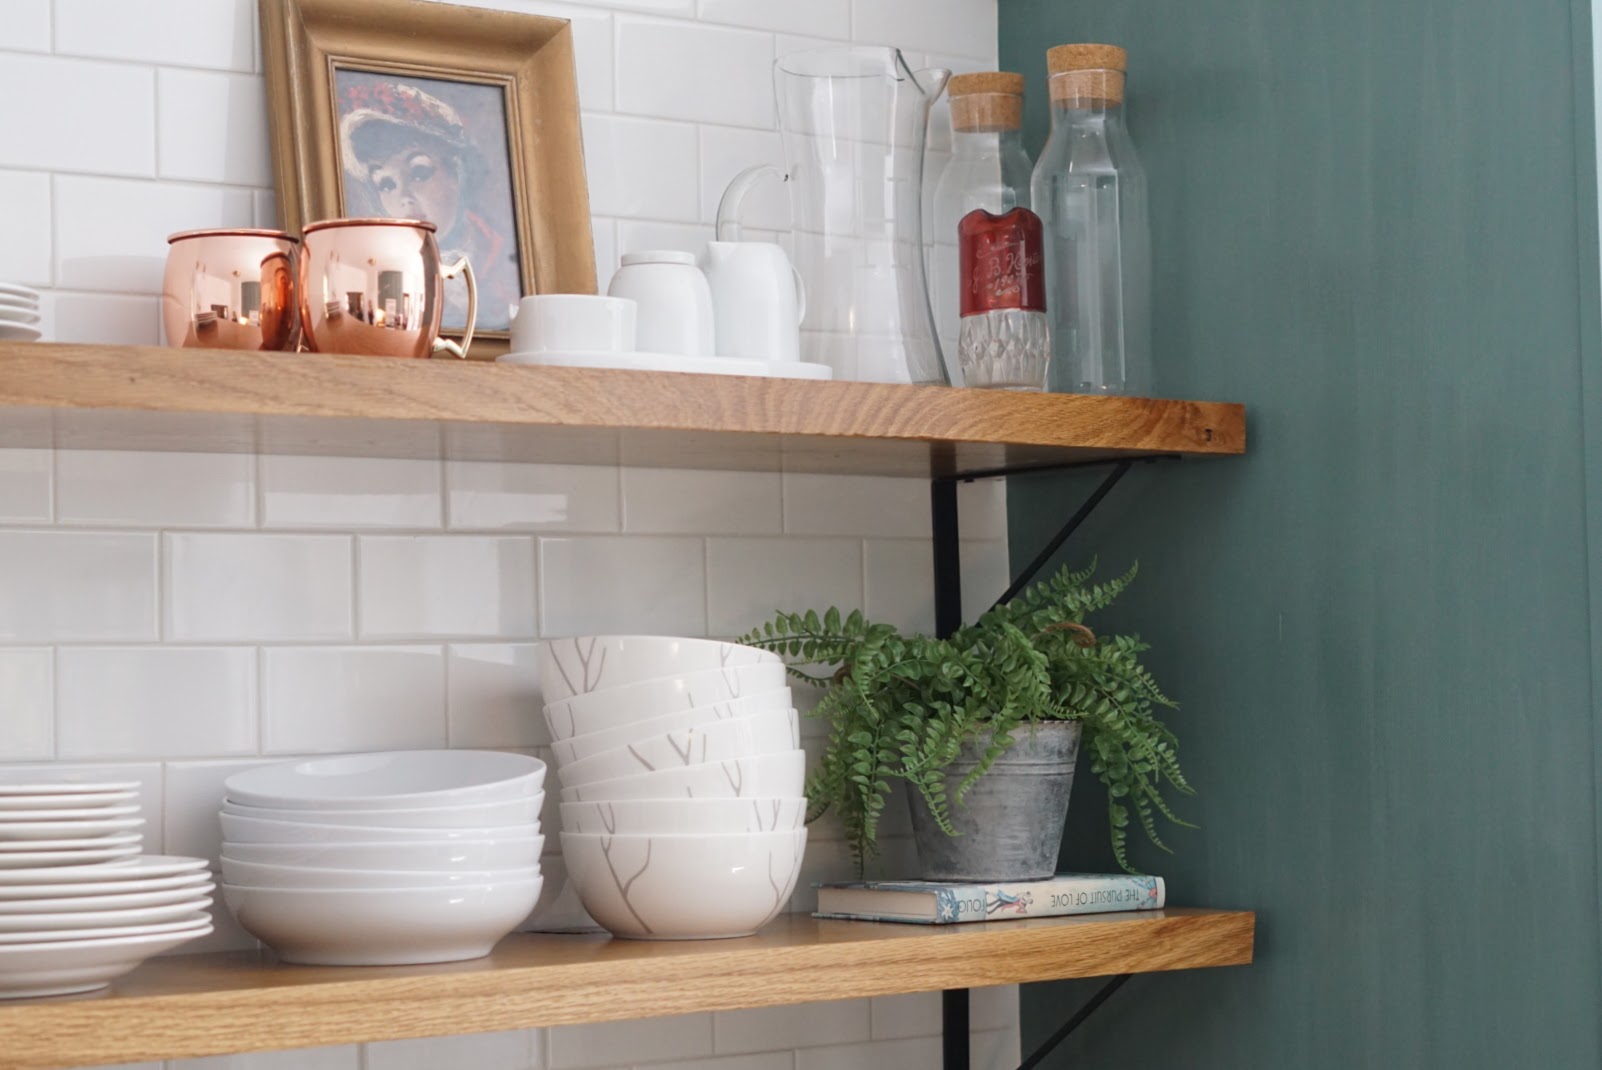
In this post I’ll share all the details of our open shelves, so in case you just so happen to like how ours turned out, you’ll have a one-stop-shop resource for your own.
How I Chose the Wood?
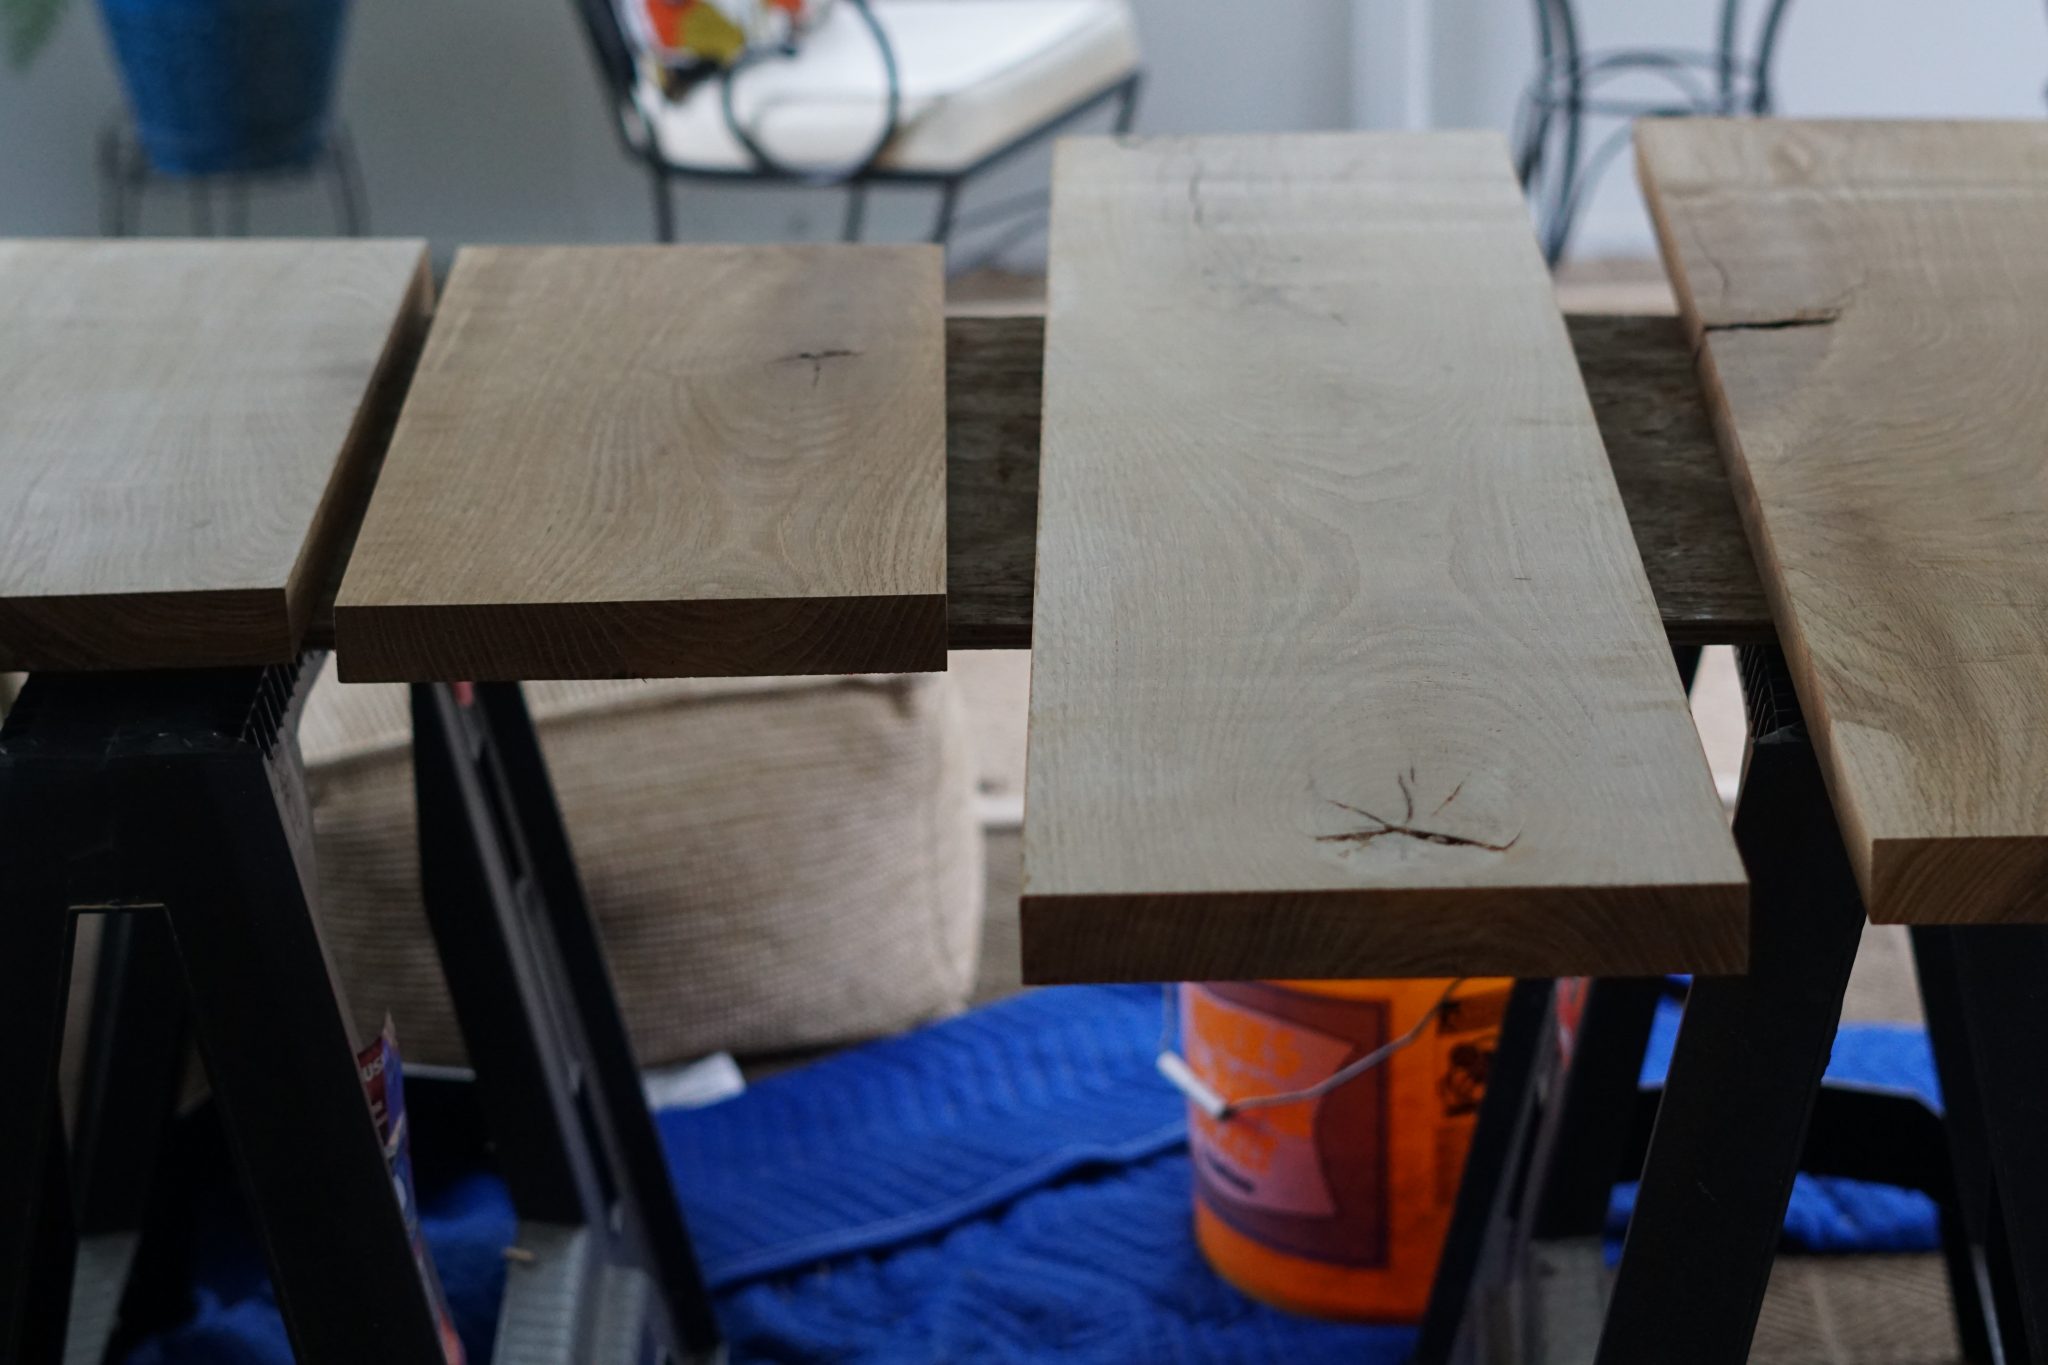
These shelves are made of 1-1/2″ white oak. As you probably know, there are tons of different options when it comes to wood. I went to a local hardwood store, Chattanooga Hardwood. It’s different than a lumber store since they carry reclaimed, exotic, and specialty wood pieces. They also cut and planed each piece to the exact measurement I needed. I told the assistant what I was looking for with the measurements, and she narrowed down their inventory to fit my 1-1/2″ thickness and lengths I needed, so this really helped narrow down my choice. Unless you want poplar or pine, I would suggest finding a hardwood store or a lumber yard who can order exactly what you’re looking for.
A few things to keep in mind when choosing wood is the durability, “stainability”, and weight. I knew our shelves would be holding quite a bit of weight, so I wanted a durable wood that wouldn’t sag over time. Also, I wanted a neutral wood that would take stain/oil well when finishing. Lastly, you’ll want a solid piece of wood that will stand the test of time, which will probably mean that it’s heavy. The shear weight of the white oak is what scared us most about hanging these shelves. It’s not the heaviest wood you can get, but it was all I could do to lift the longer shelves up the stairs. As long as you have the right tools and know where the studs are, a heavy wood will serve you well in the long run.
How Did I Finish the Wood?
Tools Needed: Danish Oil in Medium Walnut // Minwax Oil-Based Polyurethane Satin // Mineral Spirits // Oil-Based Brush // Fine-Med Grit Sand Paper
Step 1 // Starting with a medium grit sanding block or electric sander, sand down each piece until smooth. Finish with a fine grit sanding paper.
Step 2 // Clean each piece by vacuuming dusting and wiping down with a microfiber cloth. Using a clean rag, go over each piece with mineral spirits to ensure all the dust and particles are gone.
Step 3 // With a clean cloth, rub on Danish Oil with and against the grain of the wood to ensure it gets into all the crevices. Apply coats until your happy with the color (I added two). Wait 72 hours before apply a top coat.
Left: Unfinished white oak // Right: With Danish Oil Medium Walnut
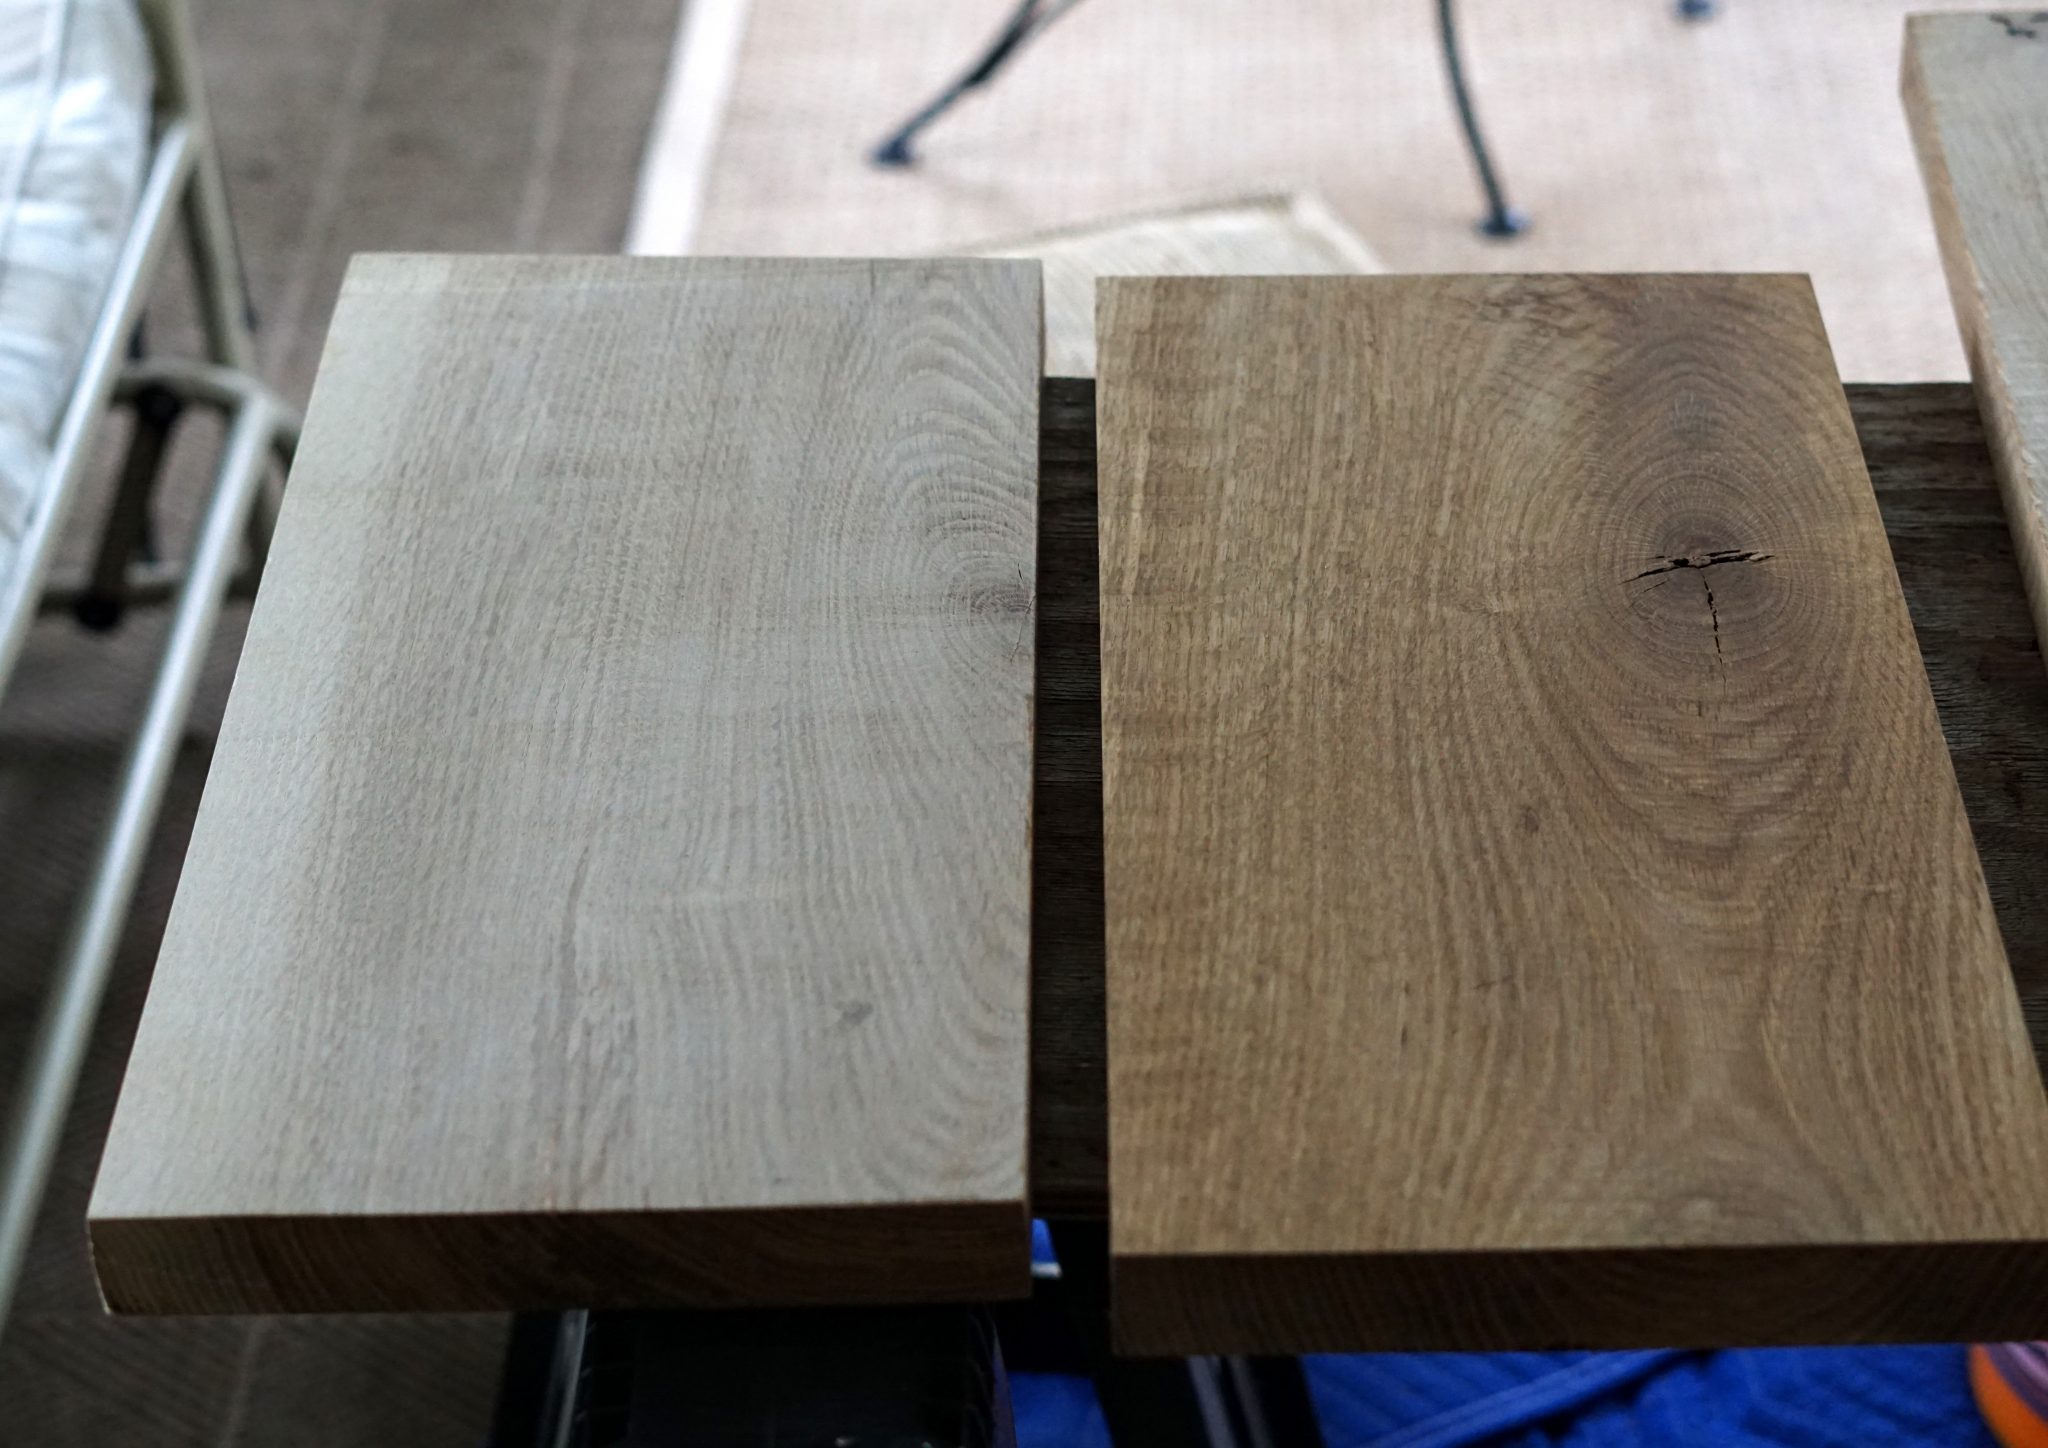
Tip: Using an oil instead of a stain makes for a more natural finish and brings out the natural grains of the wood.
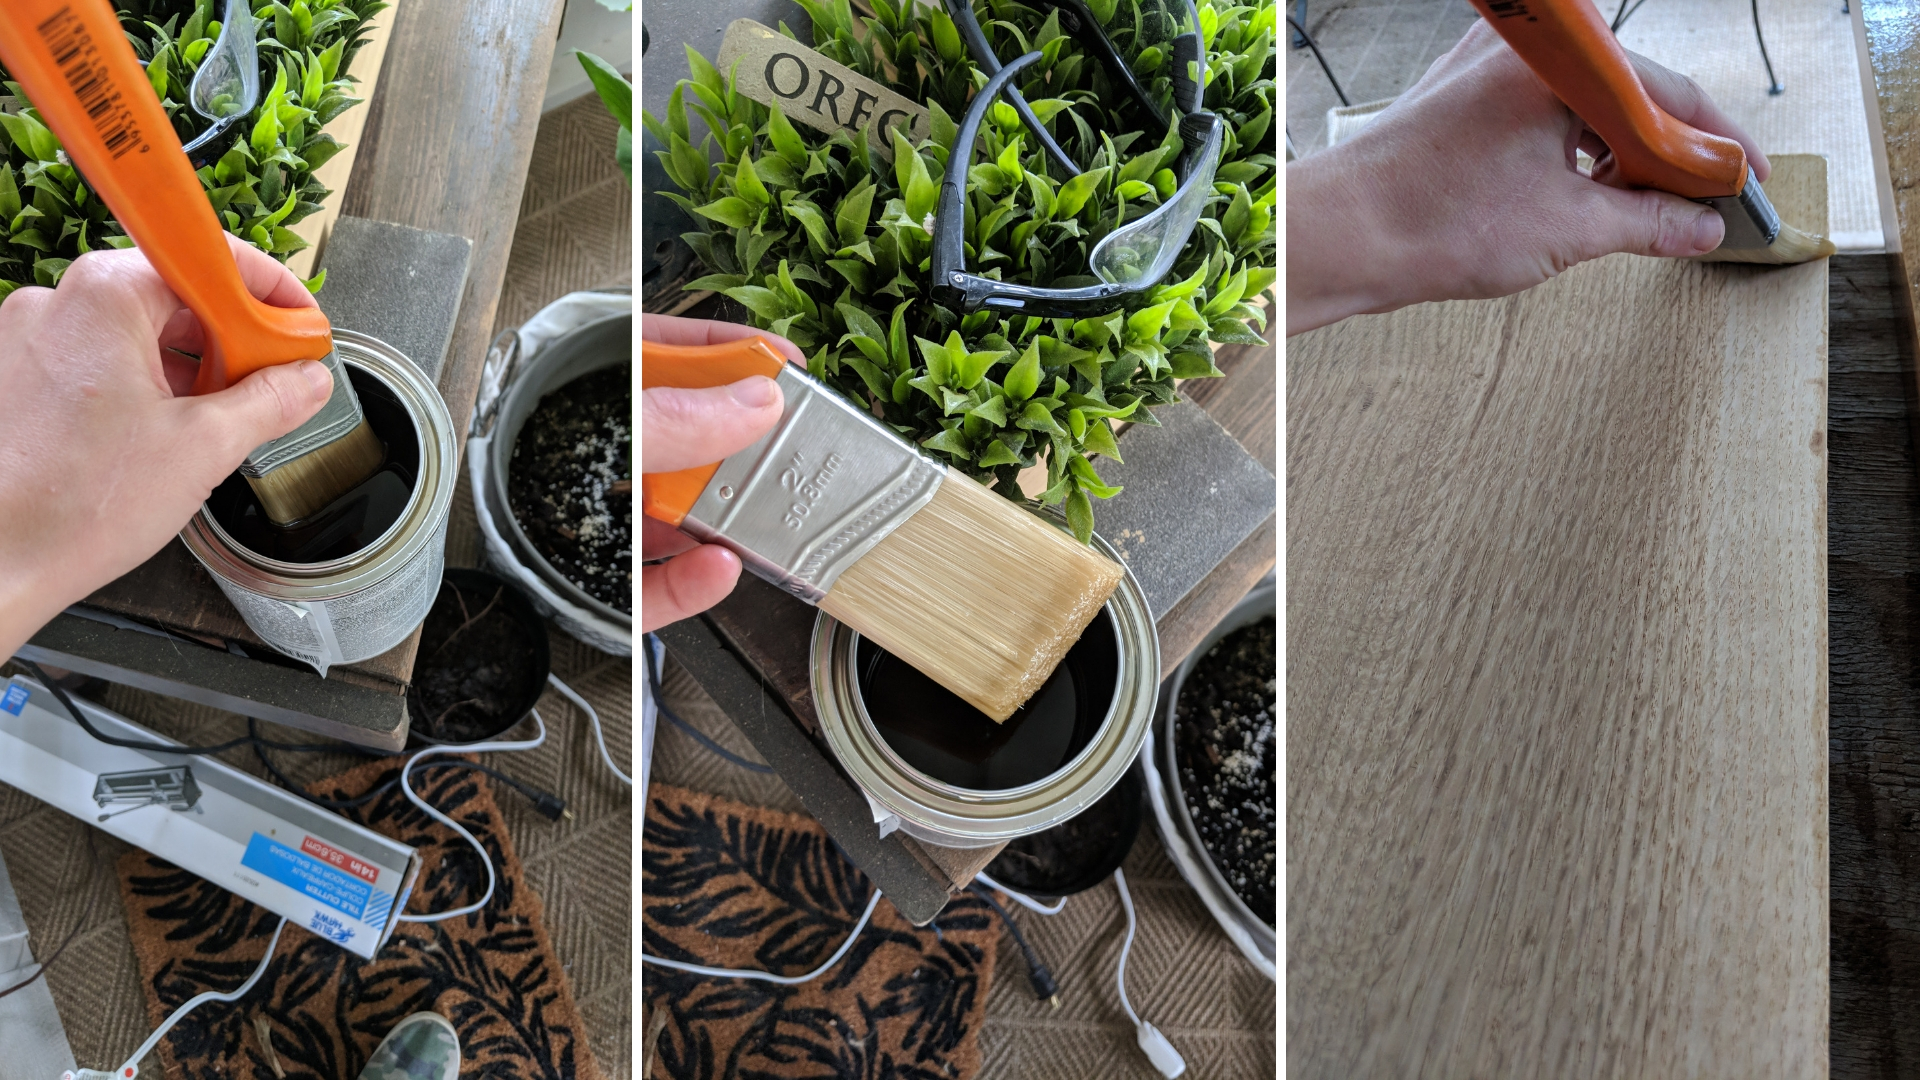
Step 4 // Soak your brush in the poly and let any big drip fall into the can. With a full brush, try to use one long stoke with the grain of the wood. If you miss any spots, wait until the next coat to touch it up. Be aware of any drips down the edges (I missed a few.). Wait about 4 hours between each coat, adding up to 4-5 total.
How Did We Install the Shelves?
The key here is to mark your studs before tiling (if applicable). You will absolutely want to install the brackets on studs with the amount of weight they’ll be holding.
There are a ton of beautiful, yet pricey, options when it comes to shelf brackets, but I just wanted something matte and minimal that could still support more than enough weight of the shelves. I chose THESE from Home Depot for less than $5 a piece!
My husband, and a knowledge friend (always nice to have around), used a piece of painters tape down the wall for measuring purposes and to get exact marks and measurements. They then drilled through the tile using a ceramic drill bit.

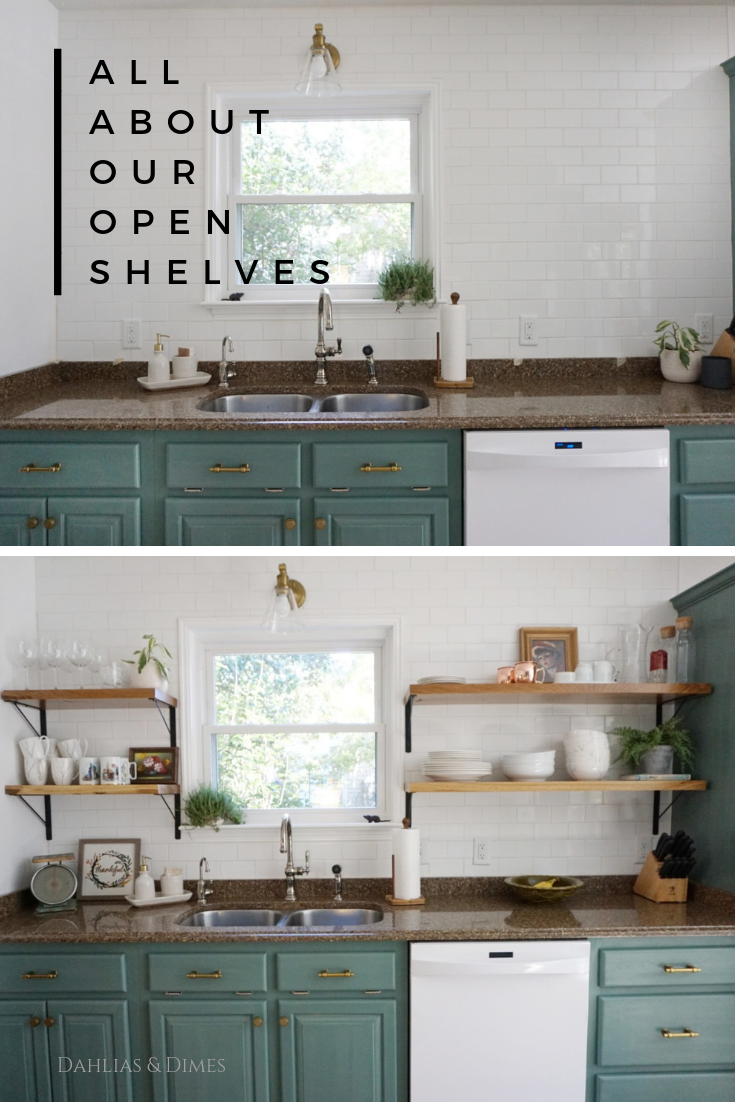
~ I went 18″ from the countertop to the first shelf and 13″ from the top of the bottom shelf to the bottom of the top shelf.
What Would We Do Differently?
- Pay closer attention to the drips from the poly. I will probably we the only one to ever notice them, but I notice them. Ugh.
- Triple check the studs. We missed a stud on the lower left bracket, which I will now I have to caulk. This, in turn, slightly cracked the tile since we had to drill another hold less than an inch away.
- That’s it! I more than happy with how these turned out. They are the ultimate feature in the kitchen. I catch myself just going in there and staring at them. They add texture, dimension, and uniqueness to this already eclectic space. They truly make this space one-of-a-kind!
Next week is the BIG ONE: The Final Reveal! Make sure to check back as I will show you all the details of our new kitchen. Also, don’t forget to check out all the other participants in the One Room Challenge. There’s some incredible talent and amazing renovations going on that you won’t want to miss!

Week 2 | Painting Oak Cabinets
Week 3 | Removing a Tiled Backsplash
